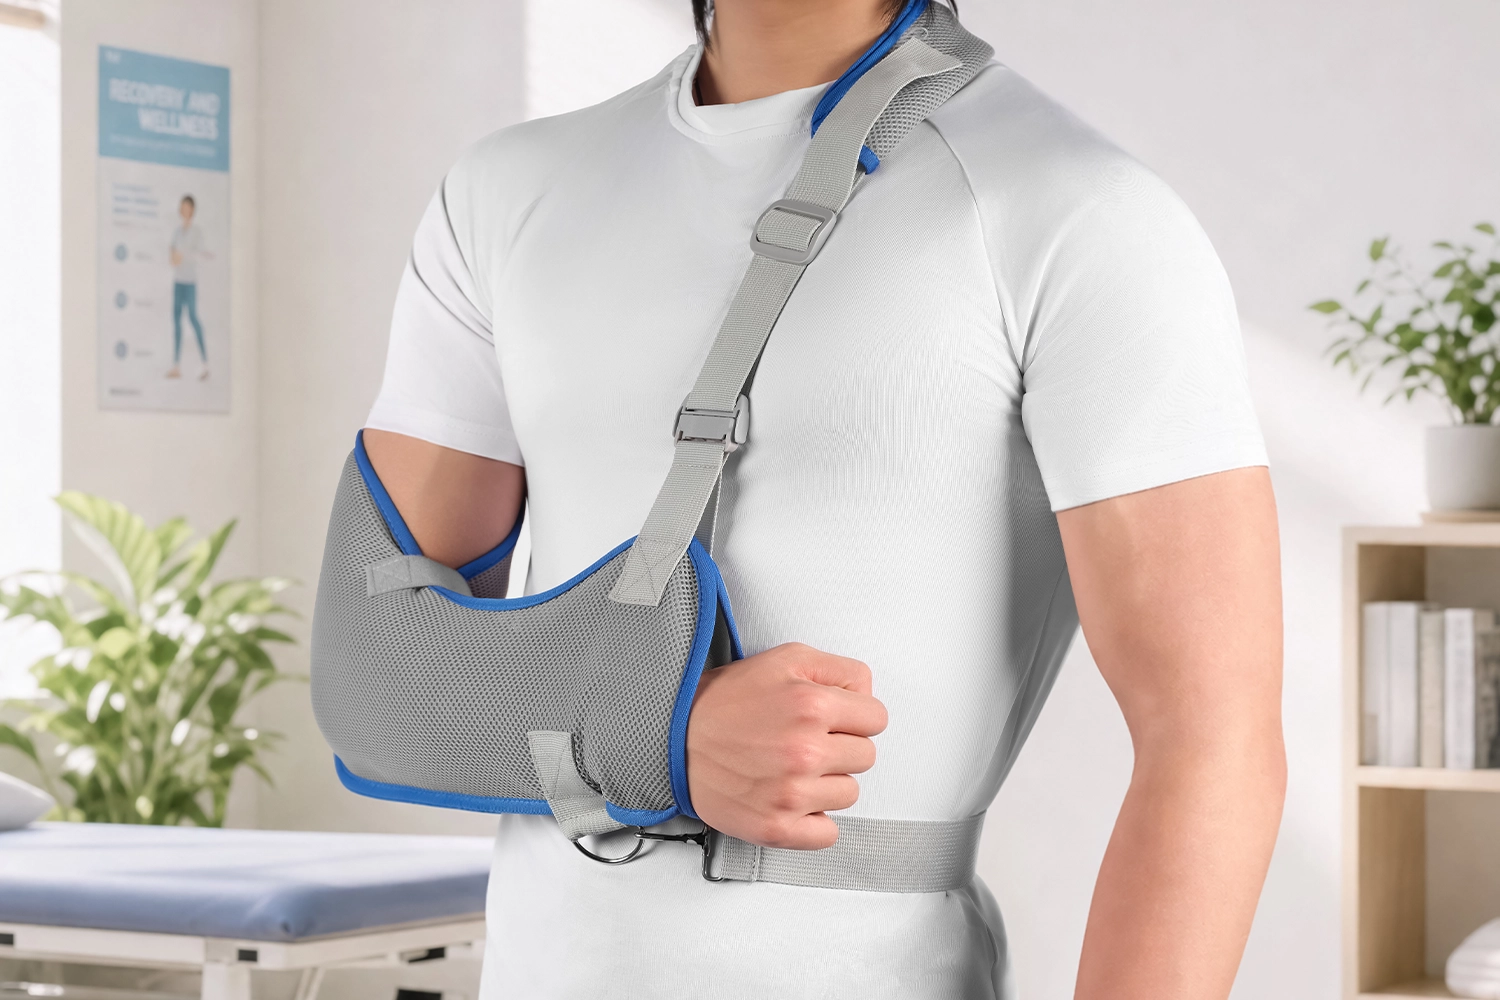
The moment it happens—a bad step off a curb, a fall down the porch stairs, a kid who insists they can do a cartwheel and is very wrong—your brain skips straight past “call someone” and lands on “I need to make this stop hurting right now.” That panic sends most people scrambling to rig up an arm sling from whatever’s within reach: a bath towel, a bandana, the t-shirt you were folding twenty minutes ago. This isn’t a theoretical exercise. It’s the practical, slightly frantic knowledge that turns a chaotic ten minutes into a calm, controlled one—showing you which household materials work, how to make a sling for arms, and when a makeshift sling isn’t enough.
Check the Injury Before Making a Homemade Arm Sling
Before you touch a single t-shirt or towel, look. Really look. Two minutes of assessment now saves you from making things worse in the next ten.
Check for bone visible through the skin, active bleeding, obvious deformity, or any sign the arm isn’t getting blood flow. If bone is showing, stop and call emergency services immediately. That’s not a sling situation anymore.
If you suspect a fracture or dislocation, resist the urge to straighten it, tuck it back, or “fix” the angle. Support the arm exactly as you found it. Realigning is a job for professionals, not for someone standing in a hallway with a folded bath towel.
Watch the fingers. Pale, blue, or cold skin, numbness, tingling, or pain that’s getting worse instead of better all point to circulation trouble. Usually it’s because the sling, once made, is too tight.
Press a fingernail until it turns white, then let go. Color should return within about 2 seconds. Slower than that, and something’s cutting off blood flow.
For a collarbone fracture, keep the person still and support the arm close to the body. For a dislocation, don’t force movement. Support the arm, keep them calm, and get to urgent care.
If there’s no blood flow, a severe deformity, or an open fracture, treat it as an emergency. Arrange transport by ambulance, not by car.
How To Make A Sling For Arms with different Household Materials
Look around before you panic-google anything. The best arm sling for a broken arm is probably already in your linen closet. A pillowcase, large scarf, folded bedsheet, cotton shirt, clean towel, or even a sarong all work as a makeshift arm sling. The magic size is roughly 40 inches square, or a triangle with a 5-foot base and 3-foot sides—big enough that the fabric can cradle a forearm without cutting into the wrist.
Fabric matters more than fashion. Go soft, breathable, and non-stretchy—stretchy knits sag under the weight of an arm, and thin materials like rope, twine, or cord will dig into the neck. Avoid those.
Make a Standard Arm Sling With a Triangular Cloth
This is the version taught in first-aid classes, printed on the inside of kits, and used by paramedics who don’t have time to improvise. An actual first-aid triangular bandage, usually sized around 42″ x 42″ x 59″, is made from non-stretch cotton or muslin. That firmness matters because it holds shape under weight, unlike a stretchy tee.
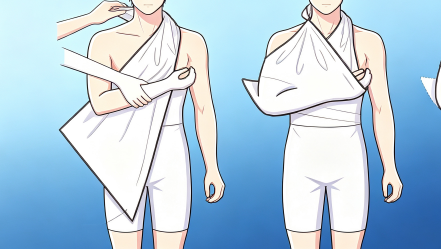
Step 1: Position the point. Slide the triangle underneath the injured arm so the point lands directly under the elbow. The arm should already be bent close to 90 degrees, resting gently across the body.
Step 2: First wrap. Bring the top corner of the fabric up and over the shoulder on the injured side.
Step 3: Second wrap. Take the bottom corner and bring it up over the forearm, meeting the other end near the shoulder and neck.
Step 4: Tie the knot at the hollow. Join the two ends with a firm reef knot, right over left then left over right, positioned in the soft hollow above the collarbone. Never let the knot rest on the back or side of the neck. Tuck the loose ends in so they don’t dangle or dig.
Step 5: Lock down the elbow. Twist the excess fabric at the elbow and fold it into itself, or fix it with a safety pin if one’s handy.
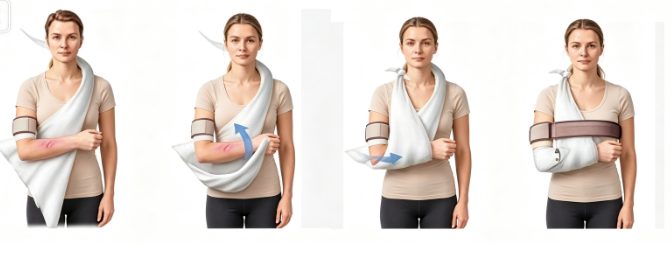
Adjust the whole thing until it supports the arm to about the base of the little finger, but leave fingertips uncovered. You’ll need to check them. Every 10 minutes, press a fingernail for 5 seconds. Color should return within 2 seconds, or the sling’s too tight.
Make an Arm Sling With a Scarf or Large Square Cloth
Grab any square cloth around 40 inches on each side, such as a scarf, a pillowcase, an actual triangular bandage, or even a bandana tied together with another if it’s small. St John Ambulance and Harvard Health both agree it should be big enough to stretch from the elbow to the opposite shoulder.
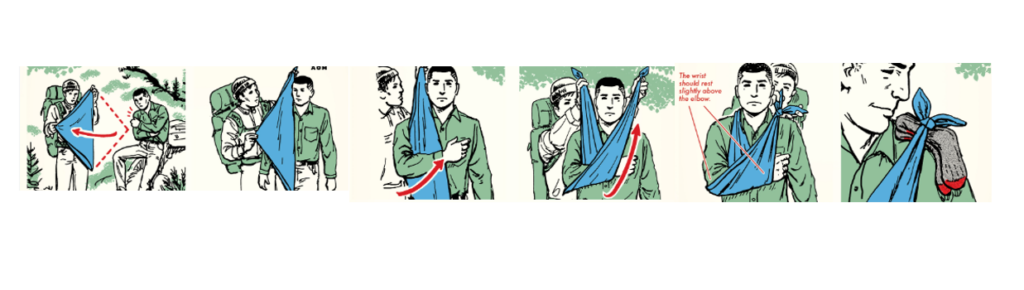
- Start with a fabric square roughly 40 inches across, folded diagonally so it forms a triangle.
- DRAPE IT over the injured shoulder with the long side towards the middle of the torso and the triangle’s top point facing away.
- ALIGN injured arm so the elbow is at the triangle’s top point and the wrist is in the middle of the triangle’s base.
- BRING the other end of the triangle up over the injured arm and uninjured shoulder.
- The wrist should rest slightly above the elbow.
- TIE THE TWO ENDS of the triangle together at the side of the neck.
- PAD THE KNOT, so the sling is more comfortable to wear long term.
Create a Quick Sling From a Shirt or T-Shirt
Nobody’s t-shirt drawer was built with first aid in mind, but it turns out that an oversized band tee you never throw away is exactly what you need. This is the no-cut option, the one that requires zero scissors and roughly ninety seconds of fumbling.
Turn the shirt upside down—yes, actually inverted—and slide the injured arm through what’s normally an armhole. Pull the neck opening up and over the opposite shoulder. You’ve just built a fabric pocket that cradles the forearm without a single knot.
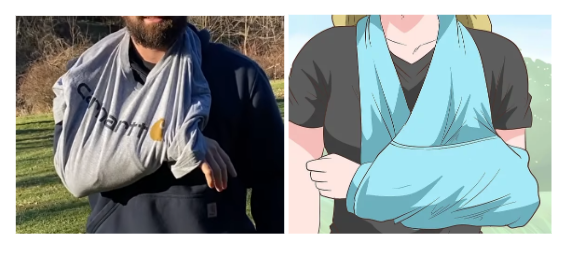
Make a sling from a long-sleeved garment. Choose a sweater, sweatshirt, button-up shirt, or any similar item with long sleeves. Fasten the sleeves together behind your head, then gently place your injured arm through the loop you’ve created. The fabric should support your arm’s full weight, extending all the way to your little finger.
Adjust the knot so the sleeve length lets your arm rest at approximately a 90-degree angle—roughly parallel to the ground.
If you have safety pins available, consider pinning the fabric around your elbow to create a makeshift backstop for the sling, following the method described above.
Use a Belt, Necktie or Long Fabric Strip for Short-Distance Support
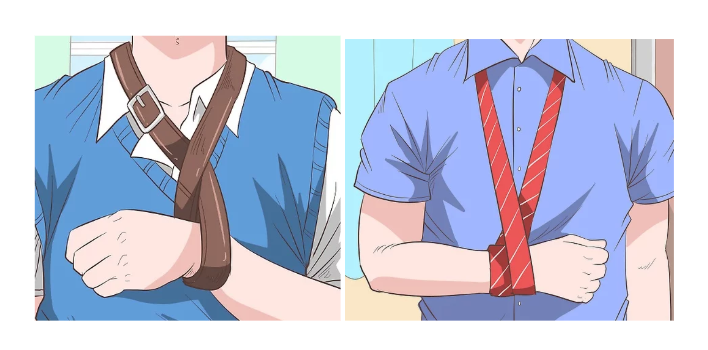
A belt is one of the best clothing items for a makeshift sling, since it naturally forms an adjustable loop. Position the buckle behind your neck, then pass your arm through the loop created by the rest of the belt. Let the belt support your arm’s weight along the forearm or wrist. Fasten or tie the belt behind your neck so your arm rests at a 90-degree angle.
Because the buckle can press uncomfortably against the back of your neck, consider rotating the belt so the buckle sits along the section stretching between your arm and neck. Adding padding between the belt and your neck can also improve comfort.
That said, a belt makes a poor primary sling and only an adequate—if clumsy—backup. Leather doesn’t breathe, buckles dig into the shoulders, and stiff fabric strips don’t cradle the forearm the way a soft t-shirt or towel does. A belt can hold an arm for the ten minutes it takes to locate proper material or walk someone to a car.
If you’re injured in an office or while dressed formally, a necktie can serve as a temporary sling until a real one is available. As with the methods above, simply tie the necktie in a basic knot behind your neck and slip your arm through the loop. Adjust the position and length so your arm hangs at a 90-degree angle.
Secure the Sling Without Causing Additional Injury
Whatever material you used—t-shirt, towel, scarf, belt—the finishing touches matter just as much as the folding. This turns a decent sling into a safe one.
Never force the arm into place. Whatever position you found it in, that’s the position it stays in. Forcing a bent elbow straight, or tugging a dislocated shoulder into “proper” alignment, can turn a clean fracture into a messy one.
Check the geometry: forearm parallel to the ground, upper arm tucked close to the body, hand riding just slightly higher than the elbow. That small upward angle keeps blood from pooling and swelling down.
Knot placement is non-negotiable. Tie behind the neck or above the collarbone on the uninjured side, never over the spine, never over the injured collarbone. A reef knot lies flat and won’t dig in the way a granny knot will.
Need extra stability? Wrap a swathe—any long strip of fabric—around the trunk, under the uninjured arm, over the sling. It pins the whole arm to the body and stops it swinging during a car ride or a hobble to urgent care.
Know When a Homemade Sling Requires Immediate Medical Care
A sling buys you time, not a diagnosis. It’s a bridge to proper care, and there’s a real difference between needing a doctor eventually, a custom shoulder brace and needing one now.
Movement is the tell. If the person can’t move their fingers, hand, shoulder, or arm at all—not because it hurts, but because they really can’t—that’s urgent. Same goes for a grating sound or sensation when the arm shifts. That’s bone or joint talking, and it’s not saying anything good.
Swelling that’s climbing fast, instead of settling once the sling’s on, is another signal. A little puffiness is normal. Swelling that worsens by the hour, especially alongside deformity, isn’t.
Pain that refuses to ease, or keeps getting worse even after you’ve supported the arm correctly, deserves the same urgency.
Watch for infection too, particularly if the sling’s been on more than a day: fever, spreading redness, warmth or heat at the site, pus or any drainage, or skin that feels oddly hot or cold to the touch.
And if the person develops shortness of breath or chest tightness alongside the arm injury, that’s not an arm problem anymore. That combination can point to something far more serious than a fracture.
Conclusion
You hope you’ll never need to know how to make a sling for an arm injury. But the day you do, you’ll be glad you already know that a T-shirt, a towel, or even a belt can work as a bandage. First, check the injury before you wrap anything. Swelling, odd angles, or numbness mean skip the DIY route. Second, a makeshift arm sling only works if it’s snug, supports the elbow, and doesn’t cut off circulation. Third, comfort isn’t the goal—stability is.
AOFIT, a leading orthopedic brace and medical support supplier, partners with hospitals, healthcare brands, and rehabilitation centers to serve patients. Call for help immediately.