You take three steps toward the kitchen, and your knee immobilizer creeps down again, bunching around your calf like it’s trying to escape. You tighten the straps, sit back down, stand up, and find yourself readjusting within minutes. If you’re recovering from knee surgery or a ligament injury, that slippage can undo the stability your doctor prescribed in the first place.
A slipping knee immobilizer almost always comes down to a handful of fixable issues: wrong strap order, a sizing mismatch, or muscle changes shifting your fit. How Do I Keep My Knee Immobilizer From Slipping Down? Before you call your doctor or order a new brace, walk through this quick diagnostic process. You’ll pinpoint why yours keeps sliding and fix it in the next five minutes, no extra gear required.
First, Determine Why Your Knee Brace Keeps Slipping Down
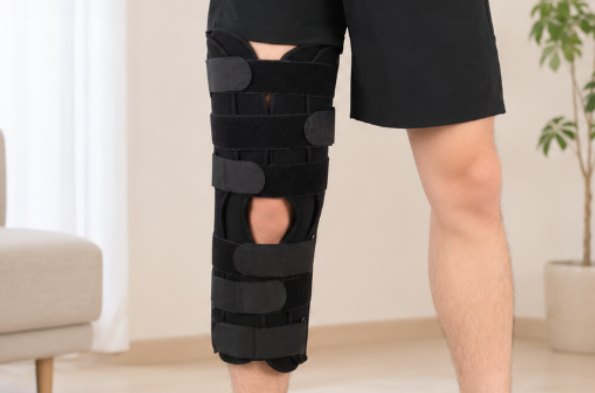
Before adjusting anything, check whether the brace is truly sliding out of position. Stand straight and note where your kneecap sits relative to the patella opening or the side hinge. Walk a few steps, take a stair, sit down, stand back up, and check that alignment again. If the brace sits lower after each movement, it is actively slipping down your leg.
Common reasons a knee brace slips while walking:
- Wrong measurements. Your knee circumference might match the size guide, but your thigh or calf measurements could be off. That taper pulls the brace down toward the narrower part of your leg.
- Tapered leg shape. When your thigh is much wider than your calf, the upper part of the brace has little contour to grip. Normal walking motion and gravity pull the material downward.
- Loose or out-of-order straps. Straps stretch and loosen as you move, and uneven tension between the top and bottom sections twists the brace out of alignment.
- Misaligned hinge or patella opening. The front opening belongs centered over your kneecap, and the mechanical hinge must sit level with your joint’s natural bend. An offset of even 2 cm creates enough drag to pull the brace down.
- Slippery contact surface. Sweat, lotion, and smooth athletic fabrics reduce the friction needed to keep the lining in place against your skin.
- Worn elastic or silicone grips. Grip strips often look fine while losing their hold. When that happens, the brace feels secure when you put it on, then starts sliding about an hour into a walk.
- Changes in leg size. Reduced swelling, muscle loss, weight changes, or general recovery progress after surgery can loosen a fit that worked two weeks ago.
- Heavy brace design. Rigid models with metal hinges and long support struts carry extra weight. If the strap setup cannot support that load on your leg shape, the brace drops.
Match the symptom to the cause:
| When it happens | Probable cause |
| Slips right after you put it on | Incorrect sizing, leg taper, or poor alignment |
| Slips after walking | Strap order, straps stretching, or low hinge placement |
| Gets worse with sweat | Moisture buildup or slick synthetic fabric underneath |
| Hurts when tightened, but still slips | Incorrect brace shape or size |
Pay close attention to that last scenario. If pulling the straps harder does not stop the slip, stop tightening them. Numbness, tingling, and discolored skin mean the brace does not fit your anatomy, and extra pressure will only restrict your circulation.
Step One: Lie Flat, Release the Straps, and Realign the Knee
Lie flat before touching another strap. Readjusting a sliding knee immobilizer while standing lets gravity pull it right back down. Get onto a firm, flat surface—a bed works if the mattress doesn’t sag—and reset the alignment from scratch.
Get your position right first:
- Keep your pelvis square without letting your hips tilt toward either side.
- Stretch both legs straight out with your toes pointing up, keeping your feet about hip-width apart so your knees do not collapse inward.
- Line your knee up along the natural path between your thigh and shin. Your kneecap should point straight toward the ceiling without any forced rotation.
- Check three landmarks: your kneecap sits centered in the joint, your knee does not drift inward or outward, and your toes, kneecap, and hips all face the same direction. This matches the standard alignment used in knee imaging with a level pelvis, no rotation, and a centered kneecap.
- If your knee will not straighten completely, slide a thin pillow under your calf or ankle instead of under the joint. Propping the back of the knee for long periods can leave it stiff and stuck in a bent position.
Once you’re aligned, hold it there:
Tighten your thigh muscles and press the back of your knee down into the bed. Hold for five seconds, then release. This follows the isometric work used in most post-surgery brace protocols. Follow this with slow, straight-leg raises: lift without bending the knee, hold for five seconds, and lower it down with control. Many rehab plans call for 100 to 150 reps a day, but check with your surgeon or physical therapist before setting your target.
Stop immediately if you notice:
- Your knee buckling inward or outward, or your toes rotating and staying turned
- Sharp pain, catching, popping, or numbness
- Increased bleeding, rapid swelling, or ongoing calf pain
If any of these happen, stop adjusting the brace yourself and call your provider.
Step 2: Tighten the Straps in the Right Order — Below the Knee First, Then Alternate Up and Down
Strap order matters more than strap tightness. Most people grab whichever strap feels loose and crank it down, hoping to stop the brace from sliding. Pulling straps out of sequence simply yanks the entire frame off-center, no matter how hard you pull.
Fasten the straps in this order:
- Center the hinge first. Line up your knee between the two side hinges before touching any straps. The hinge needs to sit level with your kneecap, never above or below it.
- Tighten the strap right below your knee. Smooth the lower fabric flat against your calf as you pull it snug, checking for wrinkles or twists.
- Move to the strap right above your knee. This locks the thigh section in place. Keep the material flat against your leg, just like you did below.
- Go back down and recheck the lower strap. Securing the top strap usually creates slack underneath. Snug it down again.
- Return to the upper strap and tighten it once more. Alternating between the lower and upper straps balances tension across the joint instead of dragging the brace toward one end.
- Finish with the outermost straps at the very top and very bottom of the brace. Some hinged models call for fastening these outer ends first before circling back to the middle pair, so check your knee immobilizer manufacturer‘s manual if it came with a diagram.
As you work, glance at both hinges and the metal support bars. If one side sits higher than the other, uneven tension pulls it off-kilter. Loosen that strap and reset the section.
How Tight Is Tight Enough
“Firm but comfortable” sounds vague until you test it with your hands. Slide one or two fingers between the strap and your skin. If they slip under without forcing, the tension is right. If you cannot wedge a finger in at all, back off. If your fingers slide in with room to spare, cinch that strap down.
Watch for numbness, tingling, cold toes, or skin turning pale or blue below the brace. Those warning signs point to pinched circulation. Loosen the straps right away and reset the fit.
Re-tighten After You Move
A brace that feels secure while you sit can slip the moment you start walking. Walk around in it for about 15 minutes, then sit down and undo each strap. Fasten them again in the same order: below the knee, above the knee, back below, back above, and finally the outer ends.
Soft tissue compresses once you stand and bear weight. Fluid shifts, muscles flex, and the frame settles against your leg. Taking 15 minutes to reset the tension stops slipping before you spend all day fighting it. If the knee immobilizer still slides after this check, reset the hinge position over your kneecap before tugging on loose straps.
Step Three: Recheck the Fit After Standing and Walking a Short Distance
Fastening the straps is only half the job. The real test happens once you are on your feet. Follow your surgeon’s weight-bearing limits closely; most post-op brace protocols require you to add weight gradually rather than stepping down with full force right away.
Test the fit in two stages:
- Stand on both feet first. Make sure your pain stays manageable and your knee feels steady without wobbling.
- Take a few steps with your walker or crutches, sticking strictly to the partial weight your doctor approved. Do not walk unsupported until your provider confirms the joint is stable.
While standing and walking, watch for:
- New or worsening pain, particularly sharp or localized tenderness
- Any wobbling, buckling, or twisting at the knee
- A limp that gets noticeably worse, or hesitation to put weight on the leg
- The brace, hinge, or straps loosening mid-step
- Redness, drainage, or gaps near an incision
- Numbness, tingling, or color changes in your toes
Match what you see to your next move:
| Result | What it means |
| Pain stays steady, no shifting, straps hold | Stable—continue as directed |
| Pain spikes, gait worsens, slight hinge movement | Questionable—pause and reassess before walking farther |
| Progressive slipping, numbness, or visible instability | Stop walking and call your provider |
Keep a brief log each time with your pain score, distance walked, how you walked, and whether the brace stayed in place. Having those notes makes it much easier to explain to your surgeon when and how any slipping happens.
Use Leg Measurements and Contact Points to Determine Whether You Really Need a Refit
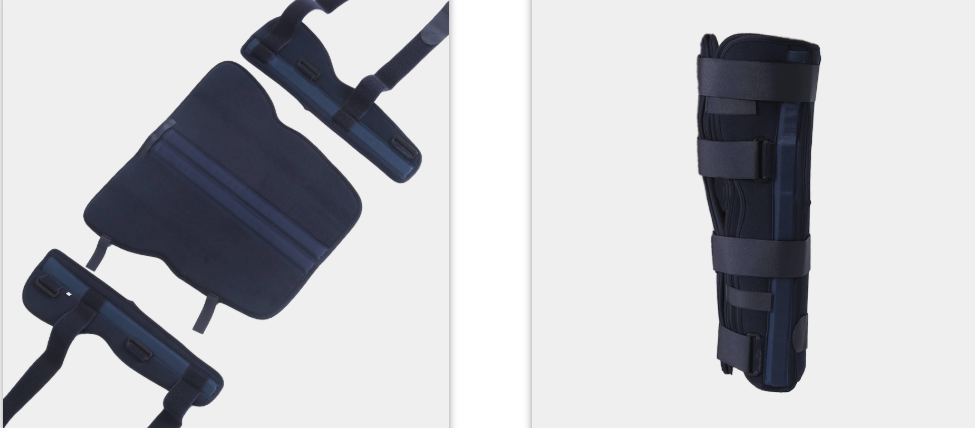
Re-strapping only helps so much. If your leg changed shape after your initial fitting, strap adjustments will not keep the brace in place. Here is how to tell whether you can correct the fit yourself or need a different size.
Measure before you guess. Use a soft tape measure to record your thigh and calf circumference at consistent reference points, such as 10 cm above and 10 cm below your kneecap. Compare those measurements to your other leg. Measure at the same time of day and in the same position, since fluid shifts can change your swelling levels from morning to night.
Volume change thresholds to watch:
- A 5% change in circumference is about the limit of what strap adjustments can handle.
- A 10% change means the brace no longer matches your leg. Muscle atrophy from reduced weight-bearing, post-surgical fluid loss, and general weight changes during recovery can cause this shift in a matter of weeks.
Check your contact points. A knee immobilizer should distribute pressure across broad areas of soft tissue rather than bone, the front edge of your shin, or surgical scars. After wearing the knee immobilizer for an hour, feel along the inside lining. If you find distinct pressure spots surrounded by loose gaps, you have a shape mismatch.
If redness, numbness, or burning lasts more than 30 minutes after taking the brace off, stop tightening the straps and get the fit reassessed.
Quick decision matrix:
| What you notice | Cause | What to do |
| Whole leg circumference down 5%+ everywhere | Muscle loss or reduced swelling | Try adjustable tightening first |
| One pressure point, skin intact elsewhere | Minor fit issue | Add padding, recheck |
| Piston-like sliding plus numbness or visible gapping | Sizing mismatch | Contact your provider for refitting |
When your volume change passes 10% and the brace slides while you walk, you need a new size.
Check for Circulation and Skin Risks First When Your Brace Slips
A slipping brace is a direct warning signal from your body. Before touching any straps, stop and run a quick neurovascular check. It takes thirty seconds and shows whether you are dealing with a minor fit issue or a problem that requires a doctor right away.
Check these five things on your lower leg and foot:
- Color and temperature. Compare both feet. Pale, blue, or cold skin indicates poor blood flow.
- Capillary refill. Press your toenail until it turns white, then release. The pink color should return within 2 seconds. A longer delay means circulation is compromised.
- Pulse. Feel for your pulse at the top of your foot or behind your ankle. A weak or missing pulse is a red flag.
- Sensation and movement. Numbness, tingling, or weakness when you try to wiggle your toes points to nerve pressure.
- Pain level. Pain that keeps climbing despite your prescribed medication is not normal. Do not ignore it.
If you spot any of these warning signs, loosen or remove the brace right away and call your healthcare provider. Pulling the straps tighter will not solve the problem.
Next, check the skin along the brace edges and over bony points like your heel or kneecap. Look for redness, blisters, raw spots, or odor. When a brace is too loose, your leg shifts inside it and rubs with every step. When it is too tight, or the padding bunches up, the constant pressure can cause sores. Note what you see before making any adjustments so you have a clear baseline to compare against once you reposition the brace.
Conclusion on How Do I Keep My Knee Immobilizer From Slipping Down
A slipping knee immobilizer usually means the straps were tightened in the wrong order. Lie flat, realign the brace so the hinge sits dead-center on your kneecap, then cinch the straps top-to-bottom-to-top instead of bottom-to-top. That sequencing fix solves the issue for most people in under five minutes, no extra gear required.
Before assuming the size is wrong, stand up and walk a few steps. Slippage shows up once you are in motion. Afterward, do a quick circulation check to make sure two fingers can slide under the strap without a fight.
If you’ve run through this checklist and it still slides during knee immobilizer for walking or shifts overnight during knee immobilizer night use, it’s time to get refitted.