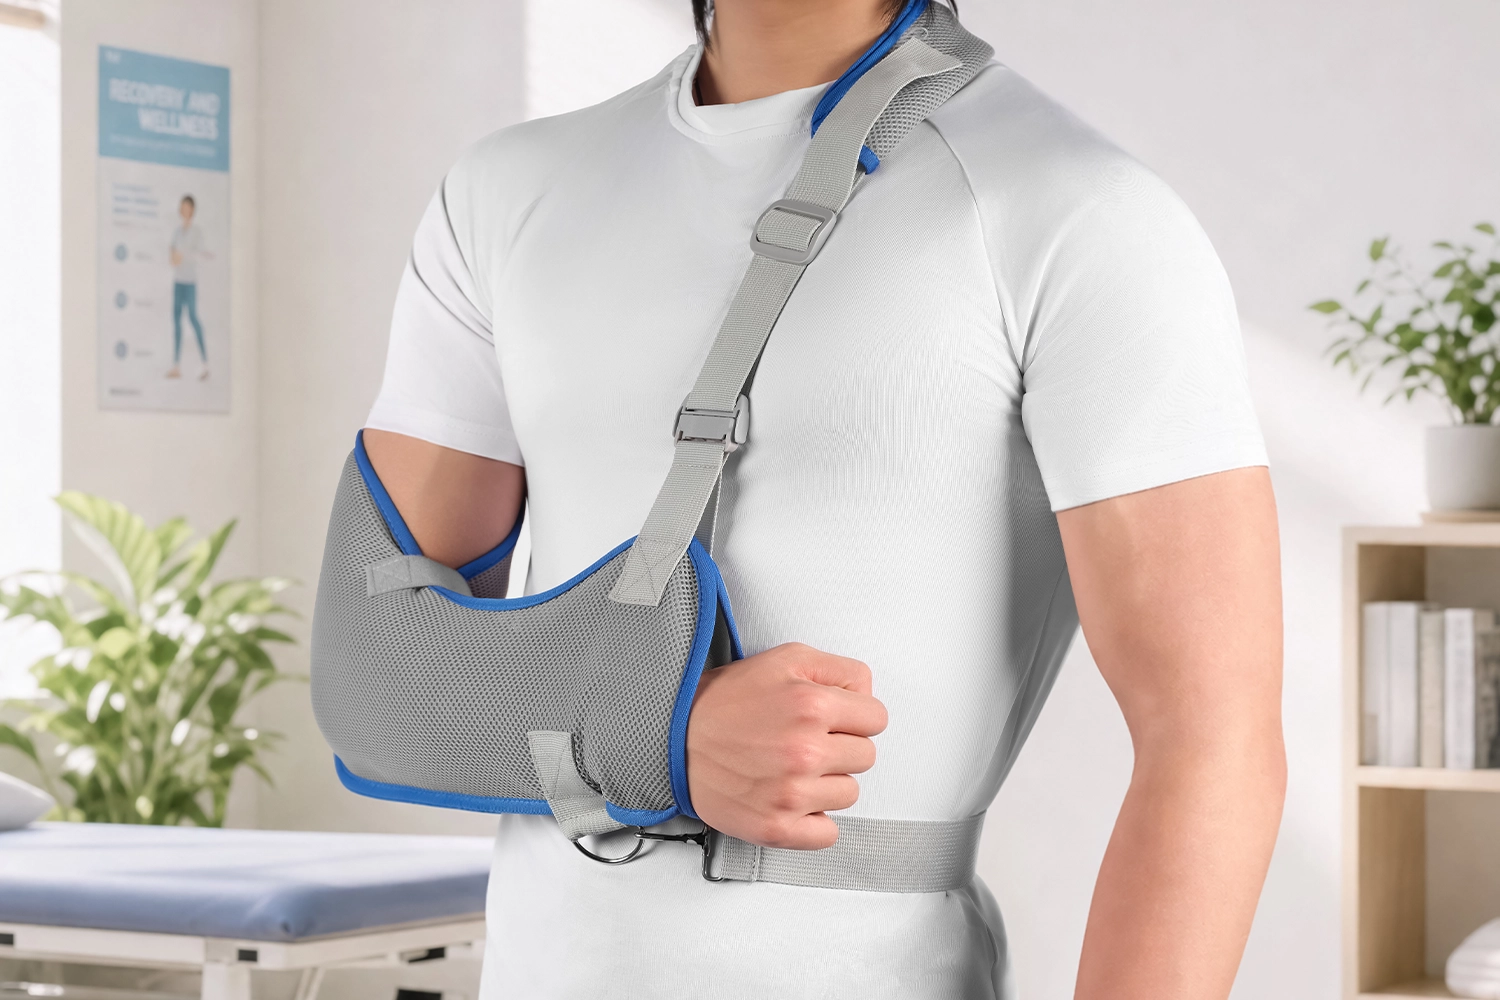
If your finger starts catching and locking at 11 PM, with the nearest pharmacy closed and an appointment still days out, this guide will get you through the night. You can immobilize trigger finger symptoms in about ten minutes with a popsicle stick and some tape instead of spending $40 on a drugstore splint. How to make a trigger finger splint? Below, I cover three ways to build a finger extension splint at home: a quick popsicle-stick version, a sturdier stiff-cardboard build, and a moldable thermoplastic option if you have the materials on hand. I also explain the exact angle your PIP joint should sit at, how long to wear it, and the warning signs that mean it’s time to call a doctor.
Gather the Materials and Measure the Finger
A trigger finger splint only works when it fits right. A loose splint lets your finger slide around, while a tight one cuts off circulation. Take two minutes to measure before you grab any tape or popsicle sticks.
What you’ll need for measuring:
– A strip of non-stretchy paper (about 100mm long and 5mm wide), or a piece of string or dental floss
– A pen or marker
– Scissors
– A ruler with millimeter markings, or a tape measure
Skip stretchy materials like elastic bands, which pull out of shape and throw off your reading.
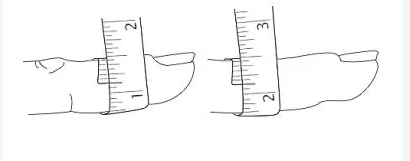
Here’s how to measure:
- Wrap the paper strip flat around the finger joint you need to immobilize, which is typically the middle knuckle (the PIP joint). Keep the strip level without twisting it.
- Pull it snug against the skin so it sits flush without pinching.
- Mark the spot where the paper overlaps.
- Lay the strip flat and measure from the edge to your mark in millimeters.
- Repeat the process twice more. When your numbers land within a millimeter of each other, you have an accurate measurement.
If the splint needs to slide over a knuckle, measure that wider point as well and go with the larger number.
Write down the finger, the joint, the circumference, and the date. Keep those numbers nearby for whichever splint design you make next.
Set the Correct Finger Position Before Making the Splint
If you get the angle wrong, your splint will either do nothing or make things worse. Take your time with this step.
For trigger finger, hand therapists recommend holding the PIP joint in slight flexion, around 15 to 20 degrees. Full extension might feel secure, but it strains the tendon sheath right at the inflamed spot and fails to stop the catching sensation you need to prevent.
To find the right position:
- Rest your hand palm-down on a flat surface.
- Let the affected finger relax without curling or pressing it flat.
- Notice the slight bend at the middle knuckle. That is your target angle.
- Do not hyperextend the joint backward. That position restricts blood flow and strains surrounding ligaments.
Keep the joints above and below the PIP joint as free as possible. Immobilizing the knuckle at the base (MCP joint) or the fingertip joint (DIP joint) is unnecessary for the trigger finger and leads to stiffness later.
Before you move on, have someone watch your hand as you make a loose fist with your uninjured fingers. The splinted finger should not rotate or cross over its neighbors. If it does, the angle is off, and you will need to adjust it before the material sets.
Make a Popsicle-Stick Trigger Finger Splint
A wooden popsicle stick is the fastest, cheapest splint material you’ll find in a kitchen drawer. It is rigid enough to keep the PIP joint from catching and locking, and once the edges are smoothed down, it won’t dig into irritated skin overnight.
Materials you’ll need:
– 1 clean wooden popsicle or craft stick, long enough to run from just below the knuckle to past the fingertip
– 2–3 strips of medical paper tape, fabric tape, or cohesive bandage
– Gauze, cotton, or moleskin for padding
– Scissors
– Sandpaper or a nail file to smooth rough edges
Skip anything metal or sharp-edged plastic. If your skin is already red or irritated, pad it before applying any tape.
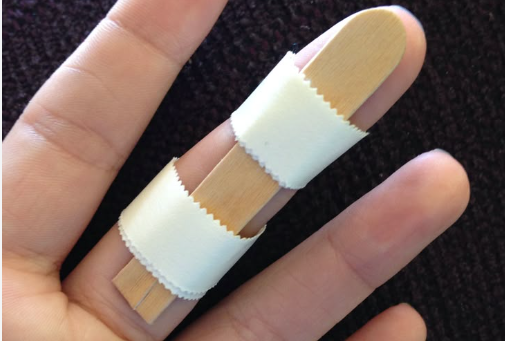
Building the splint:
- Wash and dry your hands.
- Sand down both ends of the stick until there are no splinters.
- Wrap the stick in a thin layer of gauze or moleskin.
- Lay it along the palm side of your finger, from the base to just past the tip.
- Rest the finger at that slight bend you found earlier. Do not force it flat if it is locked.
- Tape above and below the knuckle. Add a third strip near the fingertip if it feels loose.
- Leave the very tip exposed so you can monitor color changes or swelling.
Wearing it: This design works best overnight, when triggering flares up most. Wearing it during repetitive daytime tasks is fine, but take it off throughout the day so the joint does not stiffen. Most hand therapists suggest a 4–6 week trial window before reassessing.
Stop if your finger locks bent and won’t ease straight, or if you notice numbness, discoloration, or swelling. That is your cue to call a clinician.
Make a Stiff-Cardboard Trigger Finger Splint
Cardboard outlasts a popsicle stick and holds its shape better through daily use. This version targets the MCP joint (the big knuckle where your finger meets your hand) rather than the PIP joint. That keeps your fingertip and middle knuckle free to move while blocking the motion that triggers catching.
Materials you’ll need:
– Stiff corrugated cardboard or thin plastic-coated card
– Scissors, ruler, pencil
– Gauze, felt, or folded cloth for padding
– Medical tape or cohesive wrap
– Cloth tape to cover sharp cardboard edges
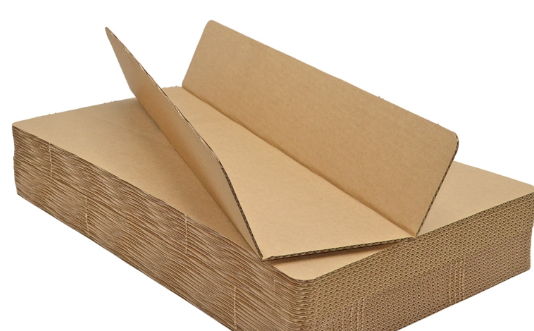
Building the splint:
- Cut a strip 2–3cm wide, running from just past the MCP joint to the base of your hand.
- Round every corner and tape over all cut edges with cloth tape.
- Pad the entire underside with gauze or felt.
- Place it on the dorsal (top) side of your hand and finger.
- Bend the MCP joint to 10–15° of flexion, keeping pressure off the painful A1 pulley at the palm crease.
- Tape around the proximal phalanx and hand, leaving the middle and fingertip joints uncovered.
Wearing it: Aim to wear it at night for 6–9 weeks, or during waking hours for up to 6 weeks. Check your skin color and warmth after 15–30 minutes, then a few times a day. Take it off right away if you notice pale or bluish skin, numbness, or deep pressure marks, since cardboard edges can irritate skin faster than commercial splints.
Make a Molded Thermoplastic Finger Extension Splint
Low-temperature thermoplastic sheets mold directly to your finger for a precise fit. It’s the closest DIY option to what a hand therapist makes in a clinic, and it holds its shape far better than cardboard or a popsicle stick.
Materials you’ll need:
– Low-temperature thermoplastic sheet, 1.6–2.4mm thick (thinner for smaller fingers, thicker for more rigidity)
– Perforated thermoplastic, if you want something lighter and more breathable
– Splint shears or scissors
– A heat pan or hot-water bath, plus a thermometer (softening range is 60–75°C)
– Marker, ruler, padding, hook-and-loop strap, and gloves to handle the warm material
Building the splint:
- Measure finger length from the MCP crease to the fingertip, then measure circumference at three points: the proximal, middle, and distal phalanx.
- Cut your pattern to finger length plus 10–15mm, with a width covering half to two-thirds of the circumference.
- Round every corner. Keep all edges clear of the DIP and PIP joint creases.
- Heat the sheet until pliable rather than melty. Test scraps first.
- Protect your finger with thin stockinette, position it at the prescribed angle, and mold the sheet with light, even pressure.
- Form reliefs over the knuckle and nail bed so nothing presses directly against bone.
- Hold the position while it cools, then trim the edges and add straps.
Check your skin after 10 minutes. If there is no redness or pain, you can extend wear toward an hour. Redness lasting past 15 minutes, numbness, or any skin color change means you need to take it off and remold.
Secure the Splint Without Restricting Circulation
A splint that’s too tight causes more damage than the trigger finger itself. Never wrap tape all the way around the finger in a continuous loop. Instead, anchor it with strips above and below the joint, leaving open skin so you can monitor blood flow.
For the one-finger test, slide your pinky between the tape and your skin. If it won’t slide in, loosen the wrap.
Before taping, check the finger’s normal color, temperature, and sensation so you have a baseline for comparison.
Once the splint is secured, press the fingernail until it turns white, then let go. Color should return within 2 seconds. A slower refill means the wrap is too snug.
Check circulation right after applying the splint, then every 10 to 30 minutes for the first couple of hours. Watch it closely overnight, since you won’t catch subtle changes while you sleep.
Loosen the wrap right away if you notice:
– Blue, pale, or cold skin
– Numbness or tingling
– Pain that keeps getting worse
– Swelling around the tape line
– A finger that cannot move at all
Swelling builds over hours rather than minutes. A splint that fits fine at 11 PM can turn into a tourniquet by 2 AM, so recheck the fit through the night rather than checking it once.
Wear the Homemade Splint Safely During the First Trial
Treat your first hour wearing the splint as a trial run. Stay put, keep your finger raised to chest level, and watch for trouble instead of walking away.
Recheck your finger:
– 5–10 minutes after applying the splint
– After any adjustment or retaping
– Every 30 minutes for the first few hours, then periodically overnight
Loosen the tape if you notice cold, pale, blue, or dusky skin, new tingling, worsening pain, or swelling against the edges. A finger that feels colder than it did before usually means the wrap is too tight.
If the color or warmth doesn’t return once you loosen the wrap, or the finger stays numb, stop the trial and get seen.
Check for Circulation, Skin Pressure, and Correct Immobilization
Grab the uninjured hand for comparison before you tape anything shut. Clinical splinting protocols call this a baseline check, and it matters as much for a homemade trigger finger splint as it does in a hospital. Note the color, temperature, and feel of the healthy finger first, then check for a distal pulse near the fingertip if you can find one. Pull off rings or snug jewelry now, before swelling traps them.
Inspect the skin you’re about to cover. Any scrapes, bruising, or bony spots like the knuckle need extra padding before tape goes near them. Pressure over a bony prominence is where DIY splints fail fastest, turning into blisters, shiny patches, or raw skin within hours.
Once the splint is on, keep checking it. Hospitals monitoring high-risk splints check hourly for the first 8 hours, then every 2 hours for a full day. Borrow that habit. Loosen the wrap immediately if you notice burning under the tape, a refill time that keeps slowing down, or pain that feels disproportionate to a sore finger.
Adjust the Splint for Common DIY Errors
Even a well-measured splint goes wrong sometimes as swelling shifts, tape stretches, or padding bunches up. Here’s how to fix the most common mistakes without starting over.
Too tight: Loosen the tape instead of cutting or reshaping a rigid popsicle stick or cardboard base. Raise your hand above heart level and wiggle your uninjured fingers to push swelling down.
Too loose after swelling drops: Re-center the finger in the splint and retape it snugly.
One spot hurts more than the rest: That is a pressure point, usually over the knuckle. Pull the tape off, add more padding there, and rebuild the wrap instead of cinching it down.
Fingertip goes pale, blue, cold, or numb: Loosen everything right away. If color, warmth, and feeling don’t return within 30 minutes, even after elevating and moving the finger, stop troubleshooting and get seen.
Splint stops immobilizing the joint: If the splint shifts and your finger catches again, extend it further past the joint instead of wrapping it tighter.
Recheck both hands side by side after every adjustment you make.
Evaluate Results and Know When to Stop DIY Treatment
Three weeks is your checkpoint. Re-evaluate your symptoms if they haven’t improved by then, or sooner if numbness creeps into your grip or you can’t straighten the finger at all.
Track your results with clear notes. Jot down your pain level, catching frequency, and finger function once or twice a day. If those numbers aren’t trending down after a reasonable trial, the splint isn’t working.
Stop DIY treatment and call a clinician if:
- Symptoms worsen
- Pain becomes severe or disrupts daily tasks
- You lose strength, sensation, or finger movement
- The joint looks deformed, hot, red, or swollen
Seek urgent care if symptoms escalate quickly or you suddenly cannot move the finger. A DIY splint only eases discomfort and will not cure stenosing tenosynovitis. If finger extension splints and rest haven’t helped after a month, see a hand specialist.
Conclusion on How To Make A Trigger Finger Splint
With a popsicle stick, some medical tape, and ten minutes, you can build a splint that holds your PIP joint in a safe, slightly extended position without a trip to the ER. The critical part is the monitoring that comes after. Check circulation every hour, watch for numbness or color changes, and never force the joint straight. If your finger still locks, swells, or goes numb after 48–72 hours of consistent splinting, see a doctor or hand therapist. Home treatment works best as a short-term bridge. Use the splint to get through the next few days comfortably, keep notes on what improves, and bring that information to your appointment.