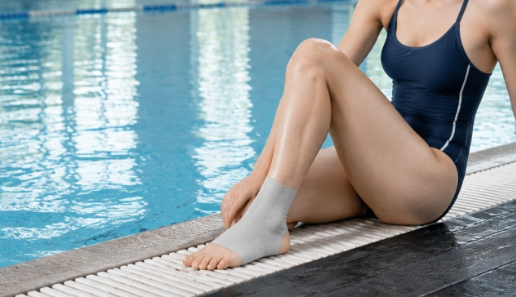
Dunking a prototype in a bucket and calling it waterproof is a quick way to end up with a pile of returns. Water soaks fabric, creeps through seams, swells hook-and-loop closures, and turns padding into a sponge strapped to someone’s ankle. Making an ankle brace waterproof means deciding how much protection you need, then building it into the barrier material, seams, fasteners, and support structure without trapping heat or losing stability. What follows compares the main approaches on cost, comfort, and production reality, shows how to test the finished product, and covers the failures that surface right before mass production. It ends with a checklist for briefing your ankle brace manufacturer.
Select Waterproof Materials for the Fabric, Film, Seams, Fasteners, and Padding
A 30,000 mm fabric still leaks through needle holes if you leave them unsealed. Waterproofing has to cover every component of the brace, from the outer shell to the internal layers.
Face fabric and film
- Face fabric: PU- or TPU-coated polyester works for most designs. Choose nylon when you need higher strength at a lower weight, and save PVC-coated polyester for heavy-duty covers.
- Film: TPU delivers flexibility, abrasion resistance, and elastic recovery. PU provides breathable performance on a tighter budget. PVC is cheap and waterproof, but the added weight makes it a poor match for an active joint.
Seams
A sealed ankle brace requires taped or welded joints matched to your base material:
- Welded RF or heat seams: Work reliably on compatible TPU and PVC.
- 3-layer seam tape: Built with a mesh backing, a TPU waterproof layer, and hot-melt adhesive. Available in 0.25, 0.30, and 0.35 mm thicknesses. Apply at 350-550°C and 0.2-0.4 MPa.
- Thin transparent tape: A 0.12 mm PVC film with PU hot-melt adhesive. Run it with hot air at 400-450°C and 5-10 m/min on PU- and PVC-coated fabrics.
Confirm that the adhesive melts below the substrate’s distortion temperature, then test peel strength after laundering.
Fasteners
- Zippers: Standard exposed coil zippers will let water in. Specify a PU-film-backed waterproof zipper with a corrosion-resistant slider.
- Snaps, rivets, and buckles: Pick acetal/POM, nylon, TPU, coated stainless steel, or anodized aluminum. Fit TPU or PU sealing washers wherever hardware penetrates the fabric wall.
Padding
Closed-cell EVA, cross-linked PE foam, and neoprene shed water far better than open-cell PU foam. Wrap exposed padding in TPU-coated textile or welded TPU film, and specify both low water absorption and reliable compression recovery.
Verify the full assembly
Benchmark at 1-5 bar for 24 hours, or 72 hours of immersion at 23°C, requiring zero penetration or delamination. Run these tests across seams, closures, and padded zones alongside the base fabric.

Reduce Water Entry Through Sealed Seams and Heat-Pressed Construction
Seams are where most waterproof ankle braces fail. Stitched needles punch hundreds of tiny holes right through your barrier, so sealing those stitch lines is the only way to keep water out.
Choose the Joining Method
Use RF/HF welding for compatible TPU or PVC-coated materials. It runs at 27.12 MHz and fuses the layers at the molecular level, leaving no needle holes behind. In pressure testing, RF-welded seams have held 1.0 bar (about a 10 m water column) without leaking.
For taped constructions, use a 20 mm three-layer seam tape. Add a second weld line on high-load seams.
Set the Seam and Process Specs
- Welded seam width: 12-16 mm.
- Heat-press trial window: 130-160°C, 0.2-0.4 MPa, 15-45 seconds dwell.
- Final settings: Lock in the lowest heat, pressure, and dwell time that pass peel and water testing on your production fabric.
- Sample production spec: Seal all body seams with 20 mm three-layer tape at 140°C, 0.3 MPa, for 25 seconds.
Set Strength and Water Targets
- Peel strength: 35 N per 50 mm is the baseline target. Well-tuned welded seams hit 150-300 N per 50 mm, or roughly 90% of the base fabric’s tensile strength.
- RFQ acceptance: Seam tensile strength must reach at least 70% of parent-fabric grab strength, with material failure occurring outside the joint.
- Seam hydrostatic head: Require at least 80% of the base fabric rating for general outdoor use. High-performance gear must match or exceed the full fabric rating.
Test finished seamed panels under ISO 811 or AATCC 127 rather than relying on flat fabric swatches. Use these benchmarks:
| Hydrostatic head | Use case |
| 1,500-5,000 mm | General outdoor |
| 5,000-10,000 mm | Sustained rain |
| 10,000-20,000 mm | Heavy rain/technical |
| 20,000+ mm | Extreme or immersion |
Inspect Every Lot
- Flex the test sample first. Hold the taped seam at 1.5 psi (about 1,050 mm H₂O) for 5 minutes, followed by 3 psi (about 2,100 mm H₂O) for 5 minutes.
- Run an air-decay or inflation test on finished braces to catch pinhole leaks that visual checks miss.
- Pull peel tests at the start, middle, and end of each lot run.
- Check joints for uneven weld lines, wrinkles, incomplete fusion, burn-through, delamination, and gaps at seam crossings.
- Cut cross-sections to verify at least 70% of original film thickness remains at the weld.
Tech-Pack Wording
Include this exact callout in your tech pack: “All exposed seams heat-sealed or RF-welded; minimum seam width 12 mm; minimum peel strength 35 N/50 mm; seam hydrostatic head to meet product target under ISO 811 or AATCC 127; finished article to pass specified IPX spray/submersion test.”
Seal the Ankle Opening, Fasteners, and Support Structure Without Reducing Mobility
On a waterproof ankle brace, the opening is where sealing and mobility work against each other. Seal it too tight and the brace blocks normal flexion. Leave it loose and water leaks right in.
Seal the Opening Outside the Fastener
Fit a flexible gusset or overlapping protective lips around the opening, placing the seal outside the primary fastener. One boot-assembly patent pairs a sliding fastener with opposed lips and flexible sealant, keeping the seal intact through repeated flexing. That same build works well for any water-resistant orthopedic brace.
Pick the Closure for the Job
- Water-resistant zipper: Delivers continuous closure with a low profile.
- Hook-and-loop panels: Provide quick donning and easy circumference adjustments.
- Snaps, hooks, or eyelet lacing: Work best for modular adjustments.
- Reel-based cable closure: Routes through internal guides for uniform tension and one-handed adjustments.
Position the zipper or opening at the rear or side of the ankle, clear of the main flexion crease. A flexible tongue or gusset between the closure edges lets the opening pull shut without stiffening the shell.
Keep Rigid Support Away From the Flex Zone
Anchor a semi-rigid heel counter or thermoplastic side stabilizers directly to the lower foot section. Keep them along the medial and lateral sides and around the heel. End them below the flexion crease, and leave textile across the front of the ankle.
Build in Layers
- Outer shell: Abrasion- and water-resistant textile or coated synthetic leather.
- Closure edge: Flexible waterproof zipper or hook-and-loop flap.
- Seal: Overlapping lips with flexible sealant in the closure cavity.
- Support: Molded heel and side stabilizers.
- Inner fit layer: Stretch sleeve tightened by cable, strap, or hook-and-loop.
Route the internal tension member through guides and join it directly to the sleeve. Tightening then pulls the sleeve close against the foot without squeezing the rigid shell.
Separate Easy Entry From Final Sealing
- Open the zipper or flap completely.
- Fold back or expand the posterior section.
- Slide the foot in.
- Reset the posterior section.
- Tighten the cable or side straps.
- Seal the external flap over the fastener.
Design Targets for the Tech Pack
- Use a two-stage closure: a primary zipper or hook-and-loop closure paired with a secondary strap or buckle.
- Adjust instep and lower-leg circumferences independently.
- Keep the seal flexible through repeated dorsiflexion and plantarflexion.
- Specify replaceable closure hardware wherever abrasion or dirt is likely.
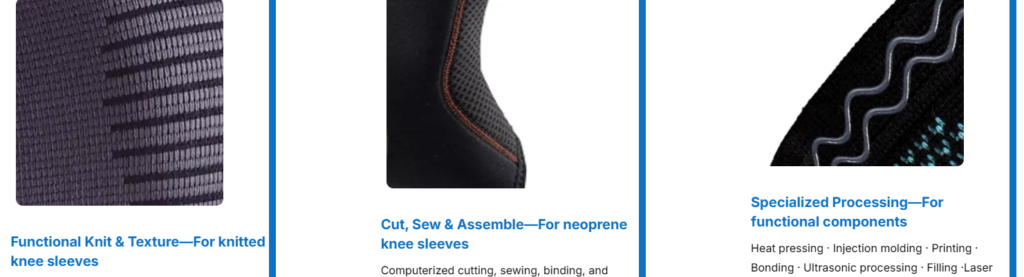
Add Hydrophobic, Quick-Dry, Antimicrobial, and Anti-Mold Treatments as Secondary Protection
These finishes act as a second line of defense rather than a replacement for membranes, sealed seams, or proper ventilation. Layer them in order: apply the hydrophobic finish to the outer face, optimize the construction for quick drying, and then add antimicrobial and anti-mold protection.
Hydrophobic Fabric Treatment
Work with a PFAS-free silicone-hybrid or dendrimer DWR. A standard add-on runs 10-30 g/L, with qualification curing set at 170°C for 90 seconds.
- Minimum target: AATCC 22 spray rating of 80 or higher after 20 washes, and a contact angle of 120° or higher after 20 ISO 6330 washes.
- Stronger target: initial rating of 90-100, maintaining 70-80% repellency after 30 washes.
| DWR type | Contact angle after 20 washes | Spray rating |
| Silicone-hybrid, PFAS-free | 100-115° | 90-100 initially |
| Dendrimer, fluorine-free | 118-132° | 80-90 |
| C6 fluorocarbon | 138-148° | 90-100 |
C6 performs best, but regional PFAS restrictions may rule it out for your product.
Quick-Dry Ankle Brace Fabric
Choose polyester, nylon, or a low-moisture-regain blend built with an open knit or dedicated wicking channels. Back the hydrophobic outer face with a wicking inner face, and avoid heavy wax or high-solids coatings that trap water vapor.
Require zero visible wet-out on the face fabric after spray testing, paired with fast moisture spreading and drying on the skin side. Confirm real-world performance by checking drying time, vertical wicking height, and total weight gain after wetting.
Antimicrobial and Anti-Mold Finishes
- Silver finishes: Surface-applied silver treatments last roughly 20-30 washes, while fiber-integrated silver can be wash-permanent. Require ISO 20743 test reports to verify performance.
- Claim wording: Decide early whether you want odor reduction, bacteriostatic protection, or mold inhibition, since each claim triggers different regulatory standards.
- Anti-mold dosing: EPA-labeled products generally run at 0.01-1.0% active solution by dry fabric weight with about 3 minutes of immersion. Spray-on formulations dilute 1:3 with water and apply from 10-15 cm. Reapplication intervals vary by label, ranging from every 28 days to roughly every 3 months.
Confirm that the chemical registration covers your exact fiber blend, intended end use, and sales territory before putting an “anti-mold” claim on the package.
Supplier Validation
Run comparative testing across untreated, DWR-only, antimicrobial-only, and fully treated swatches. Record spray ratings after 5, 10, 20, and 30 washes, and expose treated samples to high-humidity mold chambers. Review hand feel, color shade, odor, air permeability, MVTR, seam-tape adhesion, and print durability. Approve the roll goods only if the spray rating holds at 80 or better after 20 washes, antimicrobial efficacy remains intact, and no mold develops.
Validate Waterproof Performance With Complete-Product Tests
Test the finished brace rather than a fabric swatch. The IEC 60529 standard behind IP ratings applies to the entire assembled product, including seams, closures, padding, stays, and accessories.
Run the Tests in Order
- Inspect first. Record the serial number, assembly revision, and seam method, then photograph every seam, fastener, and joint. Use production-built samples only.
- Spray or jet. Use a calibrated nozzle, pressure gauge, and turntable to cover every surface, including the underside.
- IPX7 immersion. Submerge the brace in fresh water for 30 minutes, keeping the lowest point 1 m down and the highest point at least 0.15 m below the surface. Keep the brace and water temperatures within about 5°C of each other.
- IPX8 immersion. Set depth and duration before testing, such as 2 m for 24 hours.
Judge, Report, and Retest
A pass requires zero water in the padding, stays, or skin-side lining. Closures and support must still work right after testing. Cut every sample open to inspect for dampness, documenting moisture with photos or weight gain. Log the exact entry points alongside the pass or fail result.
If a sample fails, fix the cause and retest on a new sample. Qualifying an IPX7 claim requires testing at least three samples.
Conclusion on Making An Ankle Brace Waterproof
Making an ankle brace waterproof comes down to a dozen small decisions that all have to agree with each other. Start by defining what “waterproof” means for your product, whether that is shower-safe, splash-resistant, or submersible in chlorine and salt water. Then build the system around that target, using a neoprene ankle support or TPU-laminated barrier, a sealed seam ankle brace construction, and fasteners and padding that won’t soak up water.
Put your performance level and test targets at the top of the checklist in this guide, including immersion time, wash cycles, salt and chlorine aging, and rebound retention. Send it to your manufacturer before the first sample is cut. Then test the finished brace alongside the fabric, and use the three-stage sampling plan to catch leaks early.