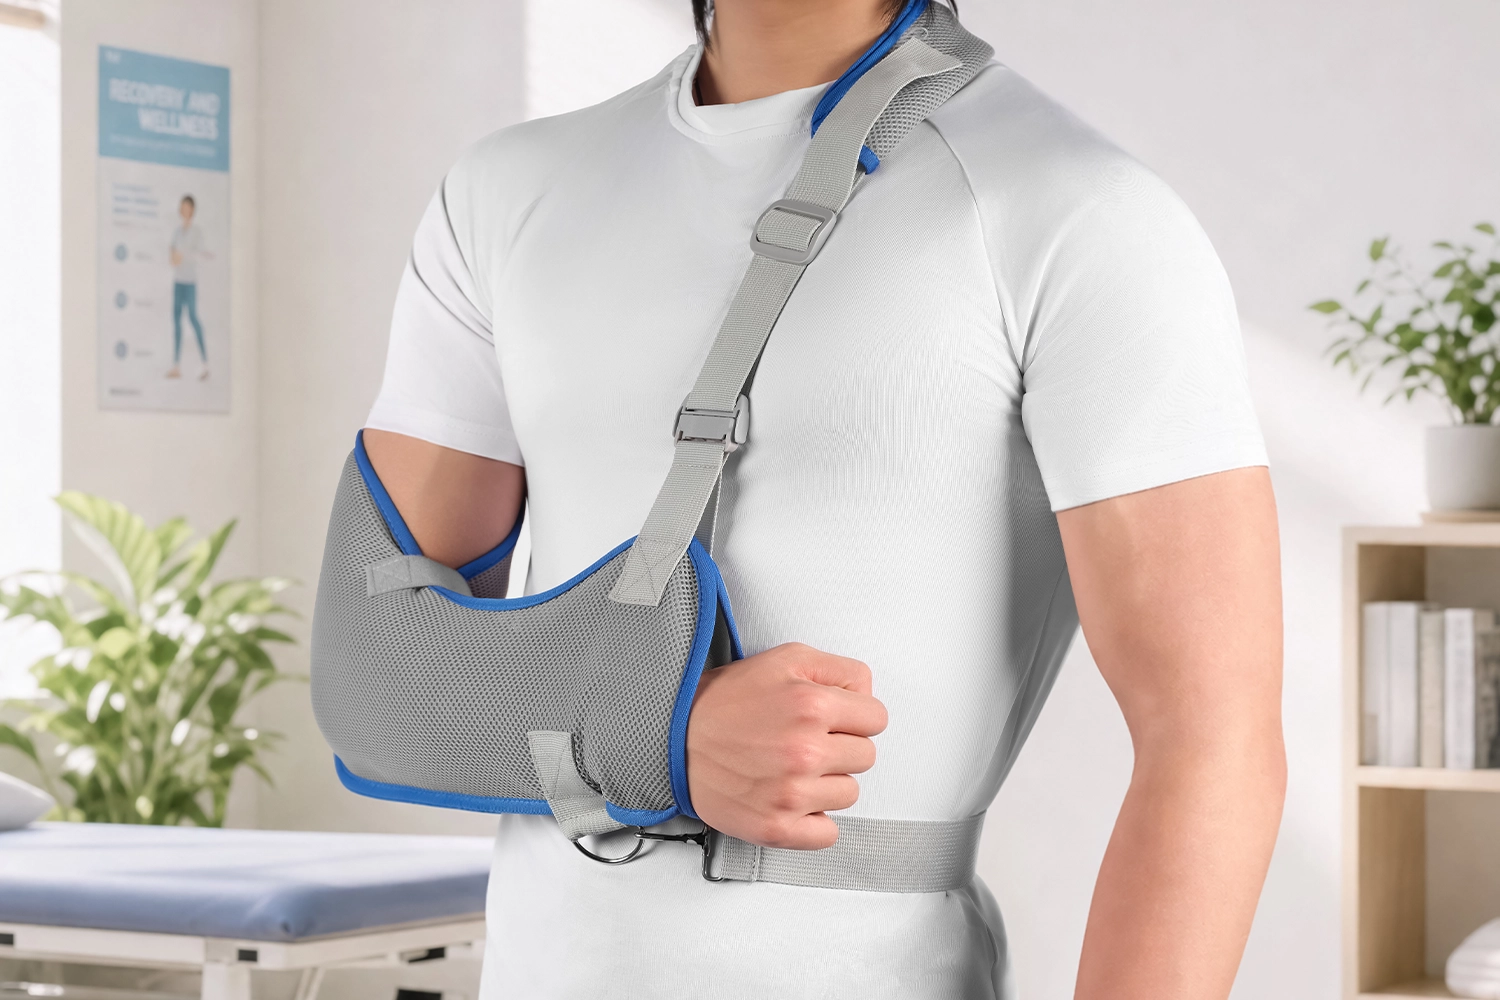
A cervical collar that’s even half an inch off can mean the difference between proper spinal immobilization and a patient who’s fighting the fit—or worse, one whose airway is compromised. Whether you’re an EMT sizing up a trauma patient on scene, a nurse fitting a post-op brace, or someone at home trying to make sense of a doctor’s prescription, getting the measurements right isn’t optional. It’s the whole job.
Getting this right comes down to two numbers: neck circumference and chin-to-sternum distance. You also need to know where to check them against the right size chart. Below we’ll walk through How To Measure For A Cervical Collar, including where to place your tape, how to read the results, and how to avoid the sizing mistakes that trip up even experienced clinicians.
Why Proper Cervical Collar Sizing Matters
The stakes here are higher than most people assume. A cervical collar that runs too tight pushes the jaw backward and can trigger airway obstruction. EMT training materials are explicit: the chin piece must hold the jaw without forcing it into the throat. Go too tight in the other direction, and you’re compressing the carotid arteries and neck veins. Clinical research has measured how rigid collars affect internal jugular vein dimensions, and the findings aren’t reassuring for anyone who’s eyeballing a fit.
A collar sized too large defeats the entire purpose of cervical spine immobilization. If the head and neck can still flex inside the collar, you haven’t restricted anything.
How To Measure For A Cervical Collar: Step-by Step Guide
Skip these steps and every measurement you take afterward is wrong.
Step 1: Position the Patient in Neutral Head Alignment
Neutral alignment is the foundation everything else builds on. Get the head and neck position off, and your neck circumference and chin-to-sternum numbers won’t match the actual anatomy you’re trying to fit.
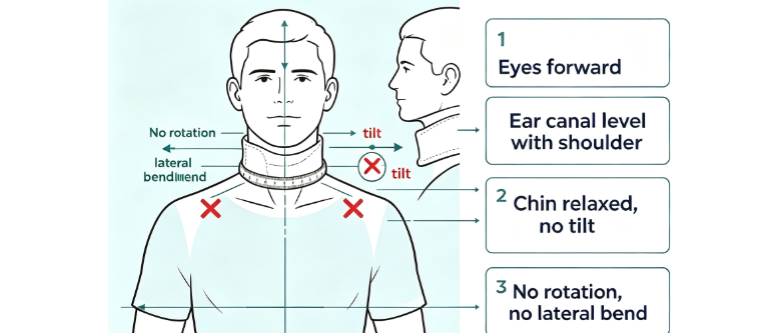
What neutral looks like:
- Eyes look straight ahead, not up or down
- Head, neck, and torso form a single line (no flexion, no extension, no rotation, no lateral tilt)
- The ear canal sits level with the shoulder (the acromion, specifically). This is the go-to visual check in trauma protocols worldwide
- Chin sits naturally, neither jutting forward nor tucked back
For a patient lying flat, the fastest visual confirmation is simple: eyes forward, ear canal level with the shoulder.
Trauma Patients Need Manual Stabilization First
If you’re dealing with a suspected cervical spine injury, one person holds manual in-line stabilization (MILS) before anyone touches a tape measure. Hands go on either side of the head, thumbs forward, fingers extending toward the occiput. Contact bony landmarks like the mastoid process and jaw rather than soft tissue. Never grip the throat.
The key rule: hold, don’t pull. No traction. If the head’s already off-center, guide it back to neutral slowly and gently, unless there’s a clear contraindication. Maintain that stability until the collar and any padding are fully secured.
Step 2: Locate the Chin-to-Shoulder (Trapezius) Measurement Points
Two anatomical landmarks determine whether your collar sizing is accurate or just guesswork. Get these wrong, and every number after this point is compromised.
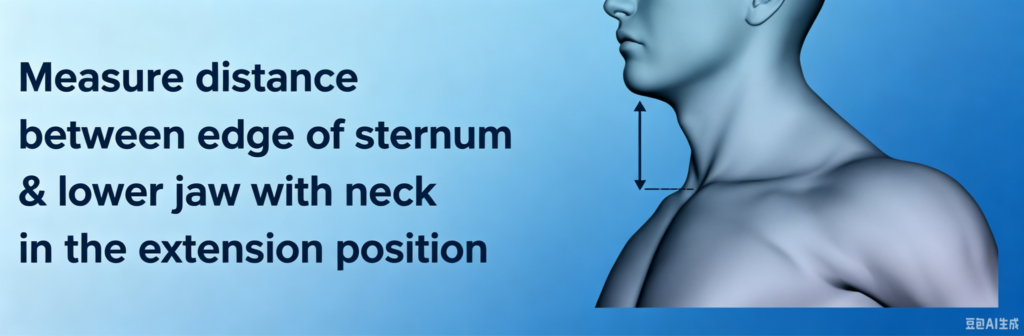
The starting point is the bottom of the chin, right beneath the jawline. Miami J collar measurement guides define sizing based on the vertical distance from this exact spot to the shoulder. UHD NHS clinical documentation supports this: with the patient’s head held in the target treatment position, you measure the vertical distance between the top of the chin and the highest point of the shoulder.
The endpoint is the highest point of the trapezius muscle, the spot where a shoulder strap would naturally rest if the patient were wearing a backpack. Some sizing systems use a different reference point. Enovis, for instance, defines their Form Fit Cervical Collar height as the measurement from sternal notch to chin—the notch at the base of the throat, not the trapezius. Know which system your collar brand uses before you start measuring, because mixing reference points produces sizing errors that look correct but aren’t.
Why Vertical Matters More Than Diagonal
This measurement must be vertical, running straight down from chin to shoulder. Tilt your tape or fingers even slightly toward the shoulder joint, and you’ll read a shorter distance than what actually exists. That shortcut leads to an undersized collar that crowds the jaw and risks airway compression instead of proper cervical spine immobilization.
Keep the patient’s head in neutral position from Step 1 while you locate these points. Movement here shifts the trapezius peak and throws off everything downstream.
Step 3: Measure the Vertical Distance
Grab your neck brace measurement tape and hold it dead straight between the two landmarks you just found, without sagging, tilting, or guessing. This is where sizing charts live or die.
How to take the reading:
- Anchor the tape at the bottom of the chin
- Run it straight down, parallel to the neck, not angled toward the shoulder
- Stop at the trapezius peak (or sternal notch, depending on your collar brand)
- Read the number in inches or centimeters, whichever your size chart uses
- Take the measurement twice. If the two readings don’t match, you rushed something
Common mistakes that throw off the vertical reading:
- Pulling the tape too taut. This compresses soft tissue and shortens the reading, leading you to size down when you shouldn’t
- Letting the tape sag or curve. A curved line is longer than a straight one, and it’ll inflate your number
- Measuring with the head out of neutral. Even a slight forward tilt shortens the chin-to-shoulder distance
- Rounding down when the number falls between sizes. For cervical spine immobilization, err toward the larger size. A collar that’s slightly big and adjustable beats one that’s crowding the airway
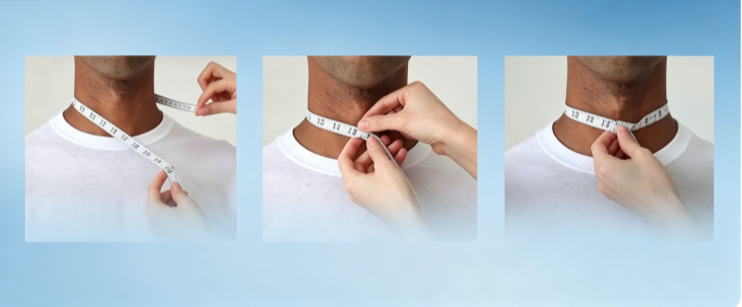
Step 4: Cross-check against neck circumference too.
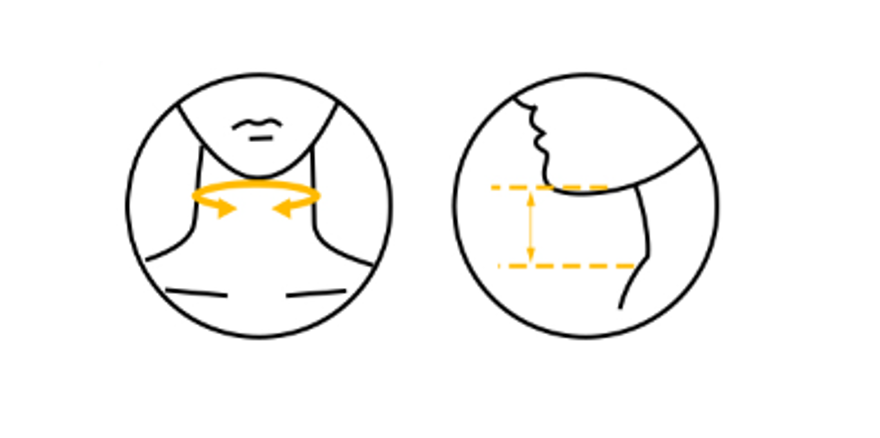
A collar isn’t sized on vertical distance alone. Wrap the tape around the neck at the level where the collar will sit, snug but not compressed, then compare both numbers against the cervical collar manufacturer‘s chart. Philadelphia collar sizing, Aspen collar measurement, and the Miami J collar size chart all use slightly different combinations of these two figures, so don’t assume one brand’s small maps to another’s.
Step 5: Match Measurements to Cervical Collar Size Charts
Numbers alone don’t help you until you know which chart to check them against. Manufacturers don’t use one universal system, and that trips up more buyers than you’d think.
Take Breg as an example, since their product line shows just how much variation exists under one brand name. Their Open Trachea collar sizes by circumference: S runs 10″–13″, M covers 13″–16″, L spans 16″–19″, and XL starts at 19″+. But their medium-density collar sizes by height instead: XS at 13.25″, S at 14.75″, M at 17.5″, L at 18.5″, XL at 20.13″, XXL at 22.75″. Same manufacturer, two different sizing philosophies.
Between sizes
When your measurement lands on a boundary, say exactly 13 inches on that Breg chart, size up. A collar that’s slightly loose beats one that compresses the airway. And never assume one brand’s medium matches another’s. Cross-check circumference and height together before finalizing the fit.
Step 6: Verify the Fit After Sizing
Sizing charts get you close. They don’t guarantee a good fit. This step is a hands-on check that confirms the collar is actually doing its job on this specific patient, right now.
Run the finger test
Slide one finger between the jaw and the collar, near the ear or the back of the jaw. It should fit snugly. That finger shouldn’t be able to slide forward toward the chin. If it can, the collar’s sitting too loose. Also check the front. If you can wedge more than a fingertip’s worth of space between the chest and the collar’s lower edge, that’s another loose-fit signal.
Confirm the chin is seated
The chin needs to rest fully on the chin support, not tucked back into it. If your finger slides freely between the jaw and the collar, the fit’s off. The chin also shouldn’t push forward past the front edge. Either extreme means the collar isn’t controlling flexion or extension the way cervical spine immobilization requires.
Watch for compression signs
Breathing discomfort, trouble swallowing, muffled speech, visible neck marks, or color changes all point to a collar that’s too tight or riding too high. Don’t wait these out. Readjust immediately.
If something’s off, confirm that the front panel contacts the chin and the back panel sits centered. No finger room at all, or visible neck compression? Loosen the strap and reposition. Finger slides all the way to the chin? Tighten and resize. After any adjustment, recheck breathing, swallowing, and speech.
Test function before calling it done
Have the patient swallow, speak, and turn their head slightly. A properly fitted rigid cervical collar or soft cervical collar should stay stable through all three. If the collar shifts, the chin slips, or the patient reports pressure during that small range of motion, the fit isn’t right yet.
A fast pass/fail check: a 1–2 finger gap is a pass, chin fully supported is a pass, no excessive flexion or extension is a pass, and normal swallowing, speaking, and slight head turn are a pass. If the finger slides easily to the chin, multiple fingers fit at the chest, or airway pressure is present, that’s a fail readjust now.
Cervical Collar Sizing Quick Reference by Type
Different types of neck brace sizing behave differently.
Rigid cervical collar vs. soft cervical collar sizing
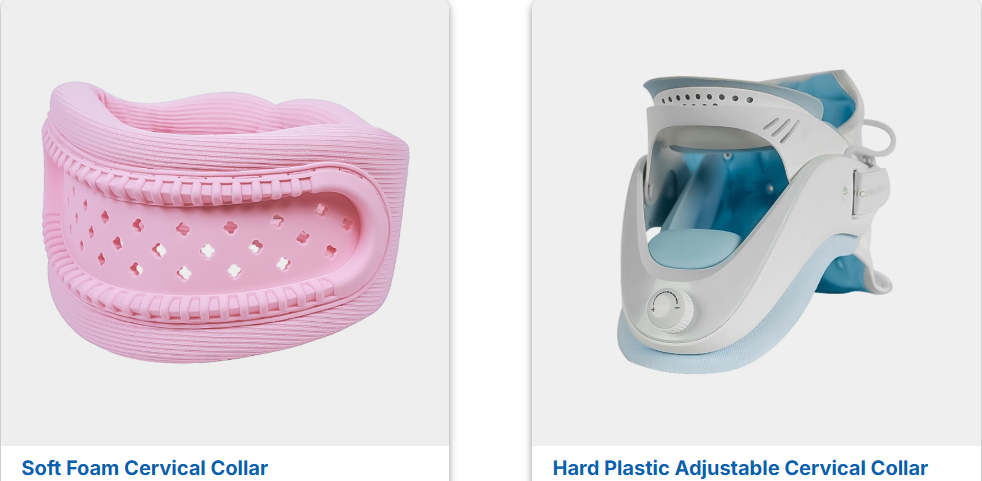
Soft cervical collars size off neck circumference. Rigid or semi-rigid collars like Philadelphia or Aspen models rely on vertical height measurements instead. Pediatric collars use their own logic entirely.
Rigid collars, being less forgiving, punish measurement error more severely. Soft collars have some give, but that doesn’t mean sloppy measuring is fine. Get the vertical distance right first, then adjust for material.
Pediatric-Specific Sizing Points
Chin coverage over the support dots is non-negotiable, otherwise the jaw slides posteriorly toward the airway. The lower edge needs to rest snugly on the chest and clavicles without pushing the jaw back. Kids outgrow collars fast, so frequent re-checks matter more here than with adult patients.
One pediatric age/size guide breaks down like this:
- 1–18 months: 11–29 lb (5–13 kg), 21–33 in (53–84 cm)
- 9–24 months: 22–33 lb (10–15 kg), 29–37 in (74–94 cm)
- 1–3 years: 24–36 lb (11–16 kg), 33–40 in (84–102 cm)
- 2–5 years: 26–42 lb (12–19 kg), 35–45 in (89–114 cm)
- 3–6 years: 27–54 lb (12–25 kg), 37–48 in (94–122 cm)
Some pediatric rigid variants specify both height and circumference together – for example, height bands around 1.125–1.25 inches paired with circumference bands like ≤9 in, 8–11 in, or 9–13 in depending on the age group.
Brand Systems That Break the Pattern
Not every brand sizes off the neck at all. Leatt’s neck brace and protection line uses chest and waist measurements instead of chin-to-shoulder height for some models. Their junior chest protector sizing runs on body-height bands: 134–146 cm and 146–159 cm. One neck-brace chart lists a 66–94 cm (25.5–37 in) waist range for S/M. Other Leatt charts sort by measure points like 18–20 cm, 19–23 cm, 22–28 cm, 28–35 cm, and 35–41 cm depending on the model family. If you’re used to standard chin-to-clavicle sizing, these charts will throw you off unless you know to look for chest and waist first.
Conclusion
Getting cervical collar sizing right makes the difference between effective immobilization and a device that does more harm than good. Keep the patient in neutral alignment before you measure, take your chin-to-sternum and neck circumference measurements with a steady hand, and always cross-check against the specific manufacturer’s size chart rather than eyeballing it.
Whether you’re an EMT sizing up a trauma patient in the field or a caregiver adjusting a loved one’s neck brace at home, precision here directly protects the cervical spine from further injury. Don’t guess—AOFIT, as your reliable medical brace manufacturer, offers you the cervical collar products with custom precision sizing info.