Ice pack in one hand, ankle brace strap in the other, and you’re frozen mid-decision. Should I Take Off My Ankle Brace To Ice It?
In most cases, take the brace off before icing. Leaving it on traps heat, blocks the cold from reaching swollen tissue, and can mess with your circulation right when you need it most. You still need to protect your skin, watch the clock before cold causes damage, and strap the brace back on at the right moment so you don’t undo your progress. Grab your ice pack, and let’s walk through what to do in the next ten minutes.
Cold transfer comes down to basic physics. Cold needs direct contact with skin (through a thin barrier, never bare) to reach the swollen tissue underneath. A neoprene or rigid ankle brace acts like an insulated cooler lid, blocking most of the therapeutic cold transfer. Taking the brace off temporarily removes that insulation so the ice pack can treat the swelling.
Should I Take Off My Ankle Brace To Ice It
Not every brace should come off.
If a doctor or physical therapist gave you a prescribed splint, an immobilizing boot, or a post-injury support with explicit instructions to keep it on, don’t touch it. Some care plans state “wear as directed, do not remove unless a clinician permits it.” Bone stability and ligament protection override the benefits of direct cold therapy. When in doubt, call the clinic before you unstrap anything.
When Icing Over the Brace Is Your Only Option
Removal is not always an option, whether you are traveling, re-strapping is too painful around the swelling, or a clinician told you to keep the brace on. In that case:
- Wrap the cold pack in cloth and place it against the brace, not bare ice.
- Never tighten the straps to compensate for reduced cold transfer; this increases compression risk.
- Check the skin frequently, as a brace can hide irritation, numbness, or pressure building underneath.
Talk to a clinician first if you have diabetes, vascular disease, reduced circulation, or decreased sensation in your foot. Cold therapy protocols assume normal nerve feedback; without it, skin damage can happen before you feel it.
Compare Icing With the Brace On vs. Off
You usually know within five minutes whether you made the right call. That is how often you need to check your skin once the ice pack goes on, and whether you leave the brace on or take it off changes what you are watching for and how fast relief arrives.
| Factor | Brace On | Brace Off |
| Cooling speed | Slower; padding and straps dull the cold transfer | Faster, more even cooling over the swollen area |
| Skin inspection | Hard to see redness, numbness, or pressure marks | Easy to check color, sensation, and swelling before and after |
| Joint stability | Keeps immobilization intact (critical post-fracture or post-surgery) | Removes support; you have to hold the limb still yourself |
| Compression risk | Higher; ice and brace pressure can choke circulation | Lower; risk comes mostly from delaying re-bracing |
Timing differs too. With the brace off, the general sprain protocol calls for 15–20 minutes of icing, 4–8 times a day during the first 48 hours, wrapped in a thin towel. Another common schedule runs 10–20 minutes at least three times a day, following that same rule against direct skin contact.
If the brace stays on, cap icing at 10–20 minutes, never longer, and check your skin at the 5-minute mark. Some post-surgery protocols allow 20-minute sessions every hour, but always keep a barrier between the ice and the brace.
Take the ice off right away if you notice burning, white or blue skin, numbness, tingling, or worsening pain. Those are clear warning signs of restricted circulation.
Protect the Ankle During the First Hour
That first hour sets the tone for your recovery. Follow this sequence minute by minute.
0–5 minutes: Stop moving. Do not test the ankle or try to walk it off. Stabilize it with a brace, splint, or supportive shoe if one is within reach.
5–10 minutes: Check for red flags before doing anything else. Get emergency help if you see an open wound, visible deformity, a cold or blue-tinted foot, or numbness that spreads fast. Check for Ottawa Ankle Rule triggers as well: tenderness at the back edge of either ankle bone, or an inability to take four steps right now. If either is present, you need an X-ray.
Through the first hour:
– Compression — Wrap an elastic bandage snugly, starting near the foot and working up. Loosen it right away if you notice tingling, coolness, or color changes below the wrap. Take it off before bed.
– Elevation — Prop the ankle above heart level, ideally while icing. Aim for 20 minutes every 2 hours over the next few days.
Skip heat, alcohol, massage, and strenuous movement for 48–72 hours. They will only worsen the swelling you are trying to control.
Apply the Ice Pack for 10–20 Minutes
Set a timer before you start. Ten to twenty minutes is the sweet spot; leaving ice on longer risks frostbite without speeding up recovery.
Here is how the timing breaks down based on the age of the injury and your icing plan:
- First 24–48 hours: Ice for up to 20 minutes every 2–3 hours. This is your highest-frequency window, when swelling develops fastest.
- Lighter alternative: 10–15 minutes every 2 hours, for as long as pain and swelling stick around.
- First 72 hours (stricter protocol): 10 minutes once per hour. After that window passes, switch to 15–20 minutes, three times a day.
Whichever schedule you pick, leave at least 30 minutes between sessions. Your skin needs time to warm back up and regain normal sensation before you ice again. Reapplying too soon on cold skin causes tissue damage.
Keep a thin towel or cloth between the ice pack and your skin every single time. Direct ice contact is an easy way to give yourself frostbite.
Never fall asleep with the ice pack on. Unsupervised skin against cold packs for hours causes ice burns.
Stop if you notice numbness, pale or very red skin, blistering, burning, or tingling. If you have Raynaud’s disease, diabetes-related nerve damage, poor circulation, an open wound, or active bleeding, talk to a clinician before icing at all. Standard cold therapy timing assumes healthy nerve feedback, which does not apply to everyone.
Recheck the Skin and Circulation After Icing
Once you take the ice pack off, your job is not finished. Take five minutes to check your skin so you catch any damage before it turns into a real injury.
Right after the ice comes off, look for:
– Intact skin without blisters, whitening, a blue tint, blotching, or severe redness
– A light pink or red tone, which is normal and fades fast
– Extreme redness, pain, blistering, or swelling that looks worse than before you started
Do not stop at checking the injured ankle on its own. Compare it side by side with your uninjured foot. Check the color, temperature, sensation, and swelling, and see if you can move both sides the same way. The differences between them will tell you far more than looking at one foot alone.
Signs of circulation trouble include cold, pale or white skin, a blue tint, growing pain, numbness, tingling, weakness, or trouble moving the foot. If you are still wearing a compression wrap or snug brace, loosen or take it off right away. Tight gear over cold skin is a bad combination.
Get urgent medical care if the foot stays cold, pale, blue, numb, weak, or increasingly painful long after the ice is gone, or if blisters appear. Those symptoms will not clear up on their own, and waiting makes the outcome worse.
Skip icing altogether if you have Raynaud’s disease, peripheral vascular disease, cold allergy, or sickle-cell disease, unless your clinician says otherwise.
Refit the Ankle Brace Without Excessive Compression
Putting the brace back on wrong can undo everything the ice just fixed. Here is the sequence to follow.
Reset before you strap anything. Open every lace and strap. Slide your heel all the way into the heel cup, keeping your ankle close to a 90-degree angle while positioning it.
Line it up. Center the heel and align the side stabilizers over your ankle bones. Keep the material flat, untwisted, and clear of the Achilles tendon.
Tighten bottom to top. Secure the lowest foot strap first, move to the middle or figure-eight strap next, and save the top compression strap for last.
The Finger Test for Proper Tension
Slide one finger under each strap to check tension. For lace-up braces, you should be able to fit two fingers under the top edge without forcing them. The brace should stay put while you walk without digging into your skin.
If the brace keeps slipping or bunching inside your shoe no matter how you adjust it, you need a different size. Cranking the straps harder will not fix a brace that fits poorly.
Wiggle your toes within five minutes. They should move easily, stay warm, and keep their normal color.
Loosen the brace if you notice numbness, tingling, color changes, new swelling, or pressure building over the ankle bones. Release every strap, reposition the brace, and retighten where needed. Walk a few steps to confirm it holds without sliding or rubbing before calling it done.
Adjust the Icing Method to the Brace Type
Not all ankle brace solutions behave the same way under a cold pack, so the “off or on” answer shifts depending on what you’re wearing.
Hinged ankle brace with a motion limit: Keep the joint locked within its prescribed range before loosening anything. If your clinician sets a restriction (say, blocking full plantar flexion), tuck a towel or cushion against the hinge so the ankle cannot drift past that limit while you ice.
Rigid post-op boot or locked immobilizer: Ice over the closed shell. Prop the leg up to chest level, place the cold pack or cold-therapy unit on top of the boot and dressing, and do not try to pry it open.
Hook-and-loop or lace-up brace: If your clinician allows it, loosen the straps instead of removing the whole brace. This lets you slide the wrapped pack closer to your skin without destabilizing the joint.
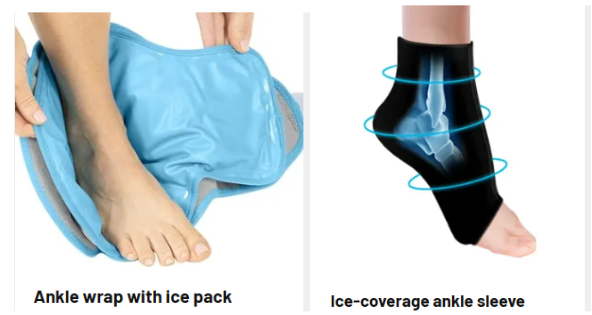
Neoprene compression sleeve with a cold-pack pocket: Slide the gel pack into the built-in sleeve rather than resting it against bare skin. If the pack came straight from the freezer, let it sit for about 10 minutes first; rock-solid ice against a thin neoprene layer can still cause frostbite.
Brace layered over a surgical dressing: Ice over the dressing and brace together. The bulk will dull how cold it feels, but the cooling effect still reaches the tissue underneath.
Across every type, keep melted water away from the brace material. A soaked strap or liner stays cold against skin long after you stop, which defeats the whole point of timing your sessions.
Stop Home Icing and Seek Medical Advice for These Signs
If you hear a crack when you hurt your ankle, feel pain that keeps climbing, or cannot put any weight on it, do not wait it out. Stop treating it at home and get a clinician to look at it.
Call for emergency care right now if the ankle:
– Looks deformed or sits at an odd angle
– Turns blue, grey, or pale, or feels cold to the touch
– Goes numb, tingles, or feels weak
– Swells rapidly within minutes instead of hours
– Cannot bear any weight or move at all
Get urgent medical advice (same day, not emergency room) if:
– Pain is severe or worsens despite ice and elevation
– Swelling or bruising keeps spreading instead of leveling off
– You cannot walk more than a few steps
– The joint feels unstable or locked in place
– Nothing improves after a few days of proper swollen ankle treatment
– Fever, chills, spreading redness, or warmth show up, as these signal an infection rather than a sprain
Pain right over a bone deserves an X-ray, particularly after a hard hit, even if ice reduces the swelling. That is usually how hidden fractures get missed. Skip home care and call your doctor right away if you have a history of diabetes, vascular disease, or poor circulation.
Conclusion
Take the brace off, ice the ankle, and put the brace back on. For most sprains, keep sessions to 15-20 minutes, place a thin barrier between ice and skin, check your skin and circulation, then refit the brace snugly without cutting off blood flow. Taking the brace off during icing makes the treatment effective instead of barely cold.
Next time you’re on the couch debating whether to unstrap the brace, take it off. Set a timer, ice the joint, rewrap it snugly, and repeat the routine every few hours for the first couple of days. If swelling keeps climbing or you can’t bear weight after 48 hours, stop self-treating and call a doctor.