You just pulled a lumbar support brace out of the box, and now you’re standing there wondering: how to wear a back brace step by step? Does this go over your shirt or under it? Should it feel snug like a hug or tight enough to leave marks? A back brace that works wonders for someone recovering from a herniated disc can be completely wrong for someone dealing with sciatica or just trying to fix their slouch at a desk job. The straps, the tightness, the hours you wear it, even whether you sleep in a back brace—all of it shifts depending on what you’re actually treating. Let’s break down exactly how to wear yours right, based on your specific situation.
How To Wear A Back Brace Correctly: Different types, Different Ways
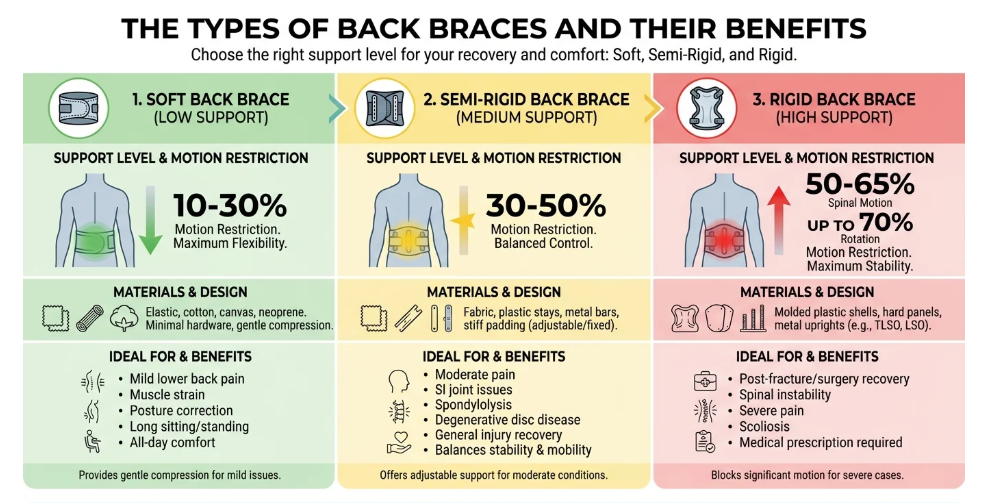
Support level is the key distinguishing factor among all back braces on the market. For anyone comparing the various types of back braces available, support level is typically the first thing to evaluate. Back brace manufacturers classify them into three groups—soft, semi-rigid, and rigid—with each type limiting spinal movement to a different degree.
Soft back braces
Soft back braces are made from materials such as elastic, cotton, canvas, or neoprene. They contain minimal hardware and offer maximum flexibility. According to comparative brace studies, these braces provide gentle compression without structural support, restricting movement by only 10–30%. This makes them ideal for mild lower back pain, muscle strain, posture correction, and prolonged sitting or standing. If you’re looking for a lower back brace that you can wear throughout an entire workday without feeling restricted, this is the right choice.
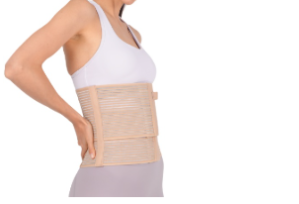
How to Put on a Back Brace with Adjustable Straps
Prepare a base layer: Put on a thin, fitted cotton shirt to prevent skin irritation and friction from the brace material.
Position the main panel: Stand tall and center the back pad over your lumbar area, placing the bottom edge just above your tailbone or buttocks and the top edge below your ribcage.
Fasten the primary closure: Wrap both sides around your front and secure the main inner belt with moderate tension. You should still be able to comfortably fit a flat hand between the brace and your body.
Adjust the secondary straps: Release the outer elastic compression or dual pull-tab straps. Pull them evenly outward and secure them forward onto the main band to dial in your desired level of firmness.
Test the fit: Take a few deep breaths, walk around, and bend gently to ensure you feel supported without restricted breathing or pinching.
How to Put a Posture Corrector On
- Wear back braces over a shirt: Place the posture corrector over a thin layer of clothing to prevent the straps from rubbing or irritating your skin.
- Put your arms through: Slip your arms through the shoulder straps just like putting on a backpack.
- Position the back panel: Make sure the center piece or spine panel rests flat along your upper back between your shoulder blades.
- Adjust the fit: Fasten the front or waist straps and pull them until they feel snug. Your shoulders should feel gently cued backward, not forced into a rigid position.
- Check for comfort: You must be able to breathe easily and move your arms freely. If your hands tingle or feel numb, loosen the straps immediately.
Semi-rigid back braces
Semi-rigid braces offer an upgraded level of support. They merge fabric construction with rigid components such as plastic stays, metal bars, or firm padding—certain elements detachable, others built in. Movement limitation rises to 30–50%, striking a balance between comfort and control. This class of brace suits moderate pain, SI joint problems, spondylolysis, degenerative disc disease, and recovery from general injuries. As an adjustable back support, it occupies the middle ground: providing sufficient stability for bending and walking while preserving a degree of mobility.
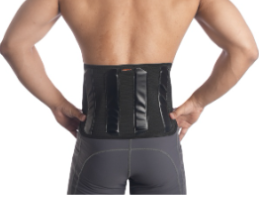
How to Put on a Back Brace with Pully system
- Wear a shirt: Put on a thin, breathable T-shirt under the brace to prevent skin irritation.
- Reset the system: Fully loosen the main belt and extend the pulley handles or strings outward so the internal mechanical cords reset.
- Align the panels: Center the back plastic or fabric panel squarely across your lumbar spine, positioning the top edge just below your ribcage and the bottom edge resting on your hips and upper buttocks.
- Fasten the main wrap: Bring the left and right side wings around your front and secure the Velcro closure comfortably around your belly button level.
- Take a breath: Take a deep breath and hold your core steady.
- Pull outward evenly: Grab both pulley handles (finger loops or pull tabs) and pull them smoothly outward and away from your body—rather than straight down or up—to evenly activate the mechanical advantage system.
- Secure the compression: Once you feel firm, supportive compression wrapping tightly around your lower back, bring the handles forward and press them onto the Velcro patch on the front of the brace.
- Assess comfort: The brace should feel snug and keep your posture upright without restricting your ability to breathe deeply or sit down comfortably.
- Adjust if needed: If the pressure feels too tight or painful, gently detach the pulley handles, ease the tension slightly, and re-attach them.
Rigid back braces
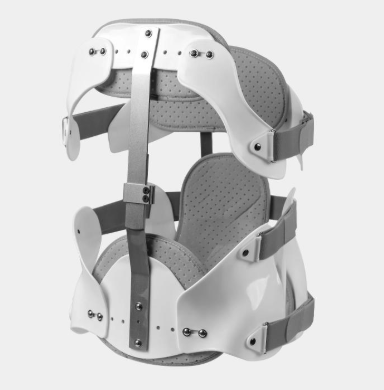
Rigid back braces—constructed from molded plastic shells, hard panels, and metal uprights—represent the highest tier of spinal support. They restrict 50–65% of spinal motion, and certain designs limit rotation by up to 70%. This category includes TLSO and LSO braces. Physicians typically recommend rigid braces following fractures or surgery, or when dealing with spinal instability, severe pain, or the need for scoliosis correction. In these cases, comfort is secondary—the primary goal is immobilization.
How to Wear a 2-Piece Plastic TLSO
A two-piece plastic TLSO (anterior and posterior shells) usually requires help from a caregiver to put on safely while lying down.
- Lie flat on your back: Roll safely onto your side, have your helper slide the back piece under you, and roll back onto the center of the back shell. Align the pelvic groove with your hip bones.
- Apply the front shell: Place the front plastic piece over your abdomen so it overlaps the edges of the back shell.
- Secure the straps: Fasten the Velcro or closure straps starting from the bottom up (lower waist, middle, then top/shoulder straps) to achieve an even, snug fit. If the brace rides up when you sit, it is too loose and needs to be retightened while lying down.
How to Wear a Front-Opening or Modular TLSO
Front-opening fabric or modular panel systems (like LSO/TLSO hybrid belts with pulley systems) can often be put on independently or with minimal assistance.
- Wear a shirt: Always wear a clean, smooth cotton T-shirt under your brace. Do not wear the plastic or fabric directly against your bare skin to prevent friction and irritation.
- Position your body: Stand up if your doctor allows it, or use a safe log-rolling technique on a bed if you must apply it while lying down.
- Center the brace: Align the back panel along your spine. Place the waist grooves low on your body, sitting in the soft space between your lower ribs and your hip bones.
- Wrap the panels: Bring the front panel across your abdomen so it overlaps the sides of the back shell evenly.
- Tighten the mechanical pull systems: Pull the side compression strings, pulleys, or secondary straps forward and downward symmetrically to lock the spine securely in place. Fasten them flat to the front panel.
- Check the fit: The brace should feel firm and supportive without restricting your ability to breathe deeply.
- Locate the pump if there is: Find the pneumatic hand pump attached to your specific brace system. Use the clear end or designated inflation valve to pump air into the rear air bladder. Stop pumping when you feel gentle, firm pressure against your spine or the level recommended by your care team. If the pressure feels too tight or painful, use the black valve or release button on the pump to let a small amount of air out until it feels comfortable.
How to Position a Back Brace for Maximum Support: The Fit Check
Once it’s on, do a quick movement test. Walk a few steps, sit down, stand back up. Does it stay centered? Does it stay flat against your body? If it rides up, twists, or slides during normal movement, it’s not positioned correctly. Reposition it before deciding it doesn’t work.
For posture correctors, check the top edge sits about two fingers below your collarbone. Use your less-active arm as a reference point so you’re not distorting the measurement.
Every brace type aims for firm, corrective support that still lets you sit, stand, and walk normally.
Back Brace Usage Time by Situation: Lower Back Pain vs Posture vs Heavy Lifting vs Post-Surgery
Four people could buy the exact same lumbar support brace this week, and each one should be using it differently. That’s the part most product listings skip.
Lower Back Pain
For everyday low back pain, think short and situational. Most guidance points to 2–6 hours a day, worn during flare-ups, heavy lifting, long car rides, or standing shifts—then removed once you’re resting. The goal here is pain control, not permanent scaffolding for your spine.
Herniated Disc & Sciatica
For a herniated disc, though, semi-rigid or rigid designs matter more—they limit the bending and twisting that stresses the damaged disc segment. Right after an acute injury, some guidance allows up to 8 hours daily for the first few days, tapering to 4 hours daily as pain settles. For a simple muscle strain, stick to 2–4 days of continuous wear, then switch to intermittent use, only during flare-ups, prolonged standing, walking, or lifting. A sciatica brace follows the same logic: short, targeted support during movements that trigger nerve pain, not all-day wear as treatment.
Posture Correction
For posture correction during desk work or driving, the logic flips slightly. You wear it during the trigger posture itself—that long stretch of sitting still. Aim for 2–4 hours per session, and take it off every couple of hours for 10–15 minutes so your skin and muscles get a breather.
Constant wear trains your body to lean on the brace instead of your own core, which defeats the purpose.
Heavy Lifting
For heavy lifting or physically demanding jobs, treat the brace as task-specific gear. Put it on for bending, pushing, pulling, or prolonged standing—roughly 2–4 hours per task—rather than wearing it all day out of habit.
Post-Surgery or Spinal Fracture
This one plays by different rules. Expect 3–8 weeks, sometimes stretching to 6–12 weeks depending on the procedure. Rigid or semi-rigid support is standard here, worn continuously even when you are sleeping and removed only per your surgeon’s instructions—not when you feel like it.
Duration matters just as much as fit. Wear your brace for the wrong number of hours and you’ll undo all that careful positioning work. The right amount shifts completely depending on why you’re wearing one in the first place.
Conclusion
The right way to wear a back brace depends on the wearing process based on types, your pain, and your application time. Whether you’re easing sciatic flare-ups, recovering post-surgery, or trying to sit through an eight-hour workday without wincing, match your lumbar support brace to the moment.
Even the best back brace won’t do its job if wearing it in the wrong way. Now choose a OEM/ODM back braces manufacturer who can give you detailed branding and complete introduction info. AOFIT, your reliable medical brace manufacturer, designs and makes braces around patients’ frustrations and gives you the most clear wearing way.